The world of portrait photography, especially of those pictures I have taken in the studio, has always interested me as it is the appropriate lighting conditions that determine the final effect, along with the possibilities of extracting those unique characteristics of the individual that is being photographed.
For as long as I can remember, I was a huge enthusiast of the works of Peter Hurley and Sue Bryce, but it was "Reunión Flecha" (photographic workshops organized in Santander, Spain), where I had the opportunity to meet and see how Jon Usual worked, and from whom I renewed my willingness to widen my knowledge in the field of portrait photography and flash lighting.
The opportunity to participate in flash light training is an important factor that can help us while on that long road to becoming a professional photographer. However, even after we have mastered the basics, we should remember two extremely important points that will allow us to further improve upon the knowledge already accumulated at the workshops:
- to enhance our knowledge of the specificity of the material we are working with,
- to implement continuous practice and experimentation to enable us to master perfectly every work tool.
While looking for the best tools for my work, I tested various types of studio lighting. Although these ranged from Starblitz to Profoto, I ultimately decided on the Quadralite Reporter 360 TTL. This was due to the unusual mobility that I intended to use both in the studio and in the outdoors.
So I would like to invite you to familiarize yourself with some of the classic light settings in portrait photography. Toni, as a volunteer, offered his assistance in testing these and I hope that the results will inspire you to create better photos.
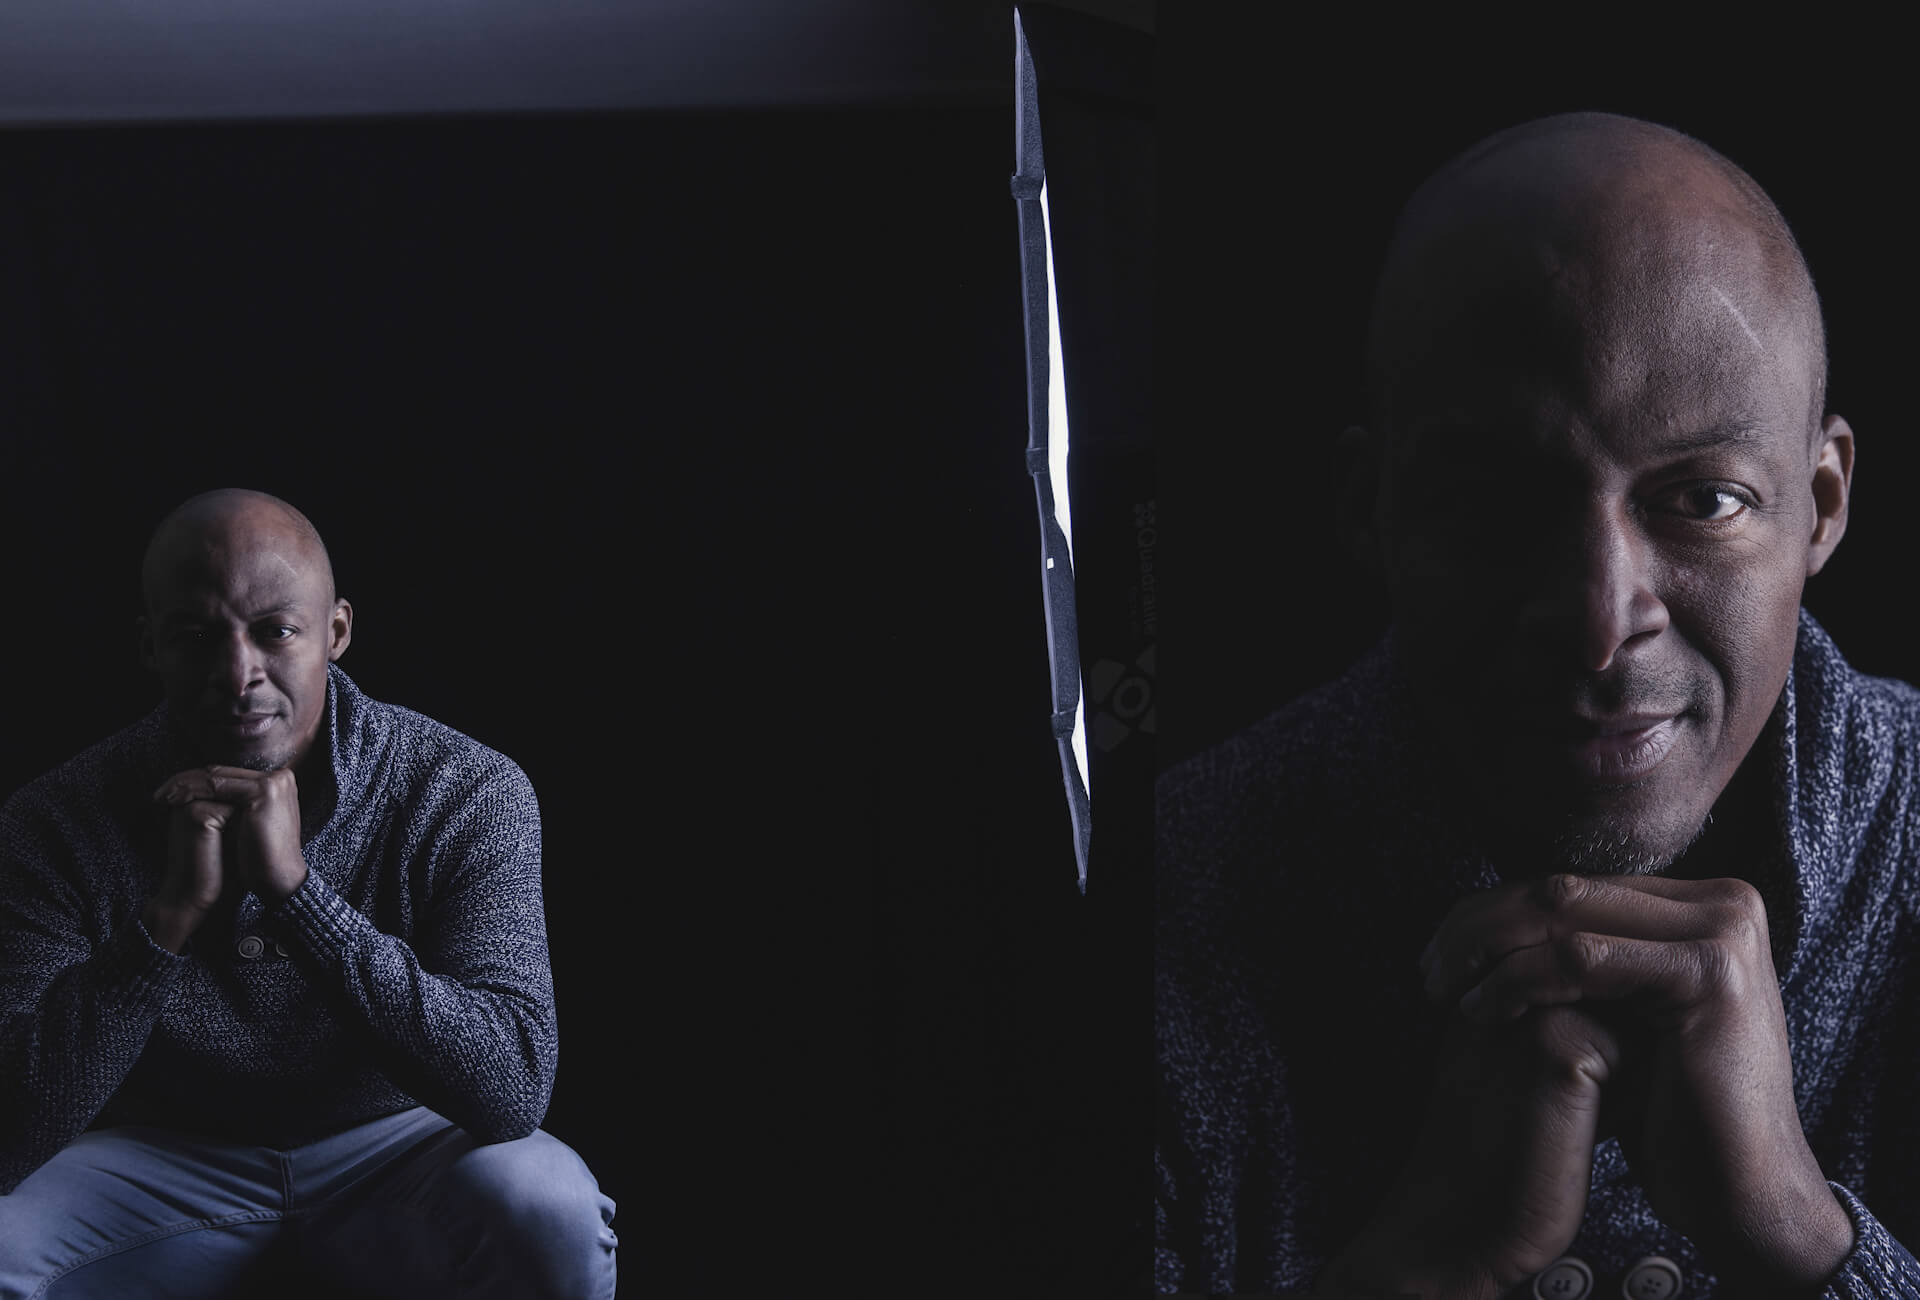
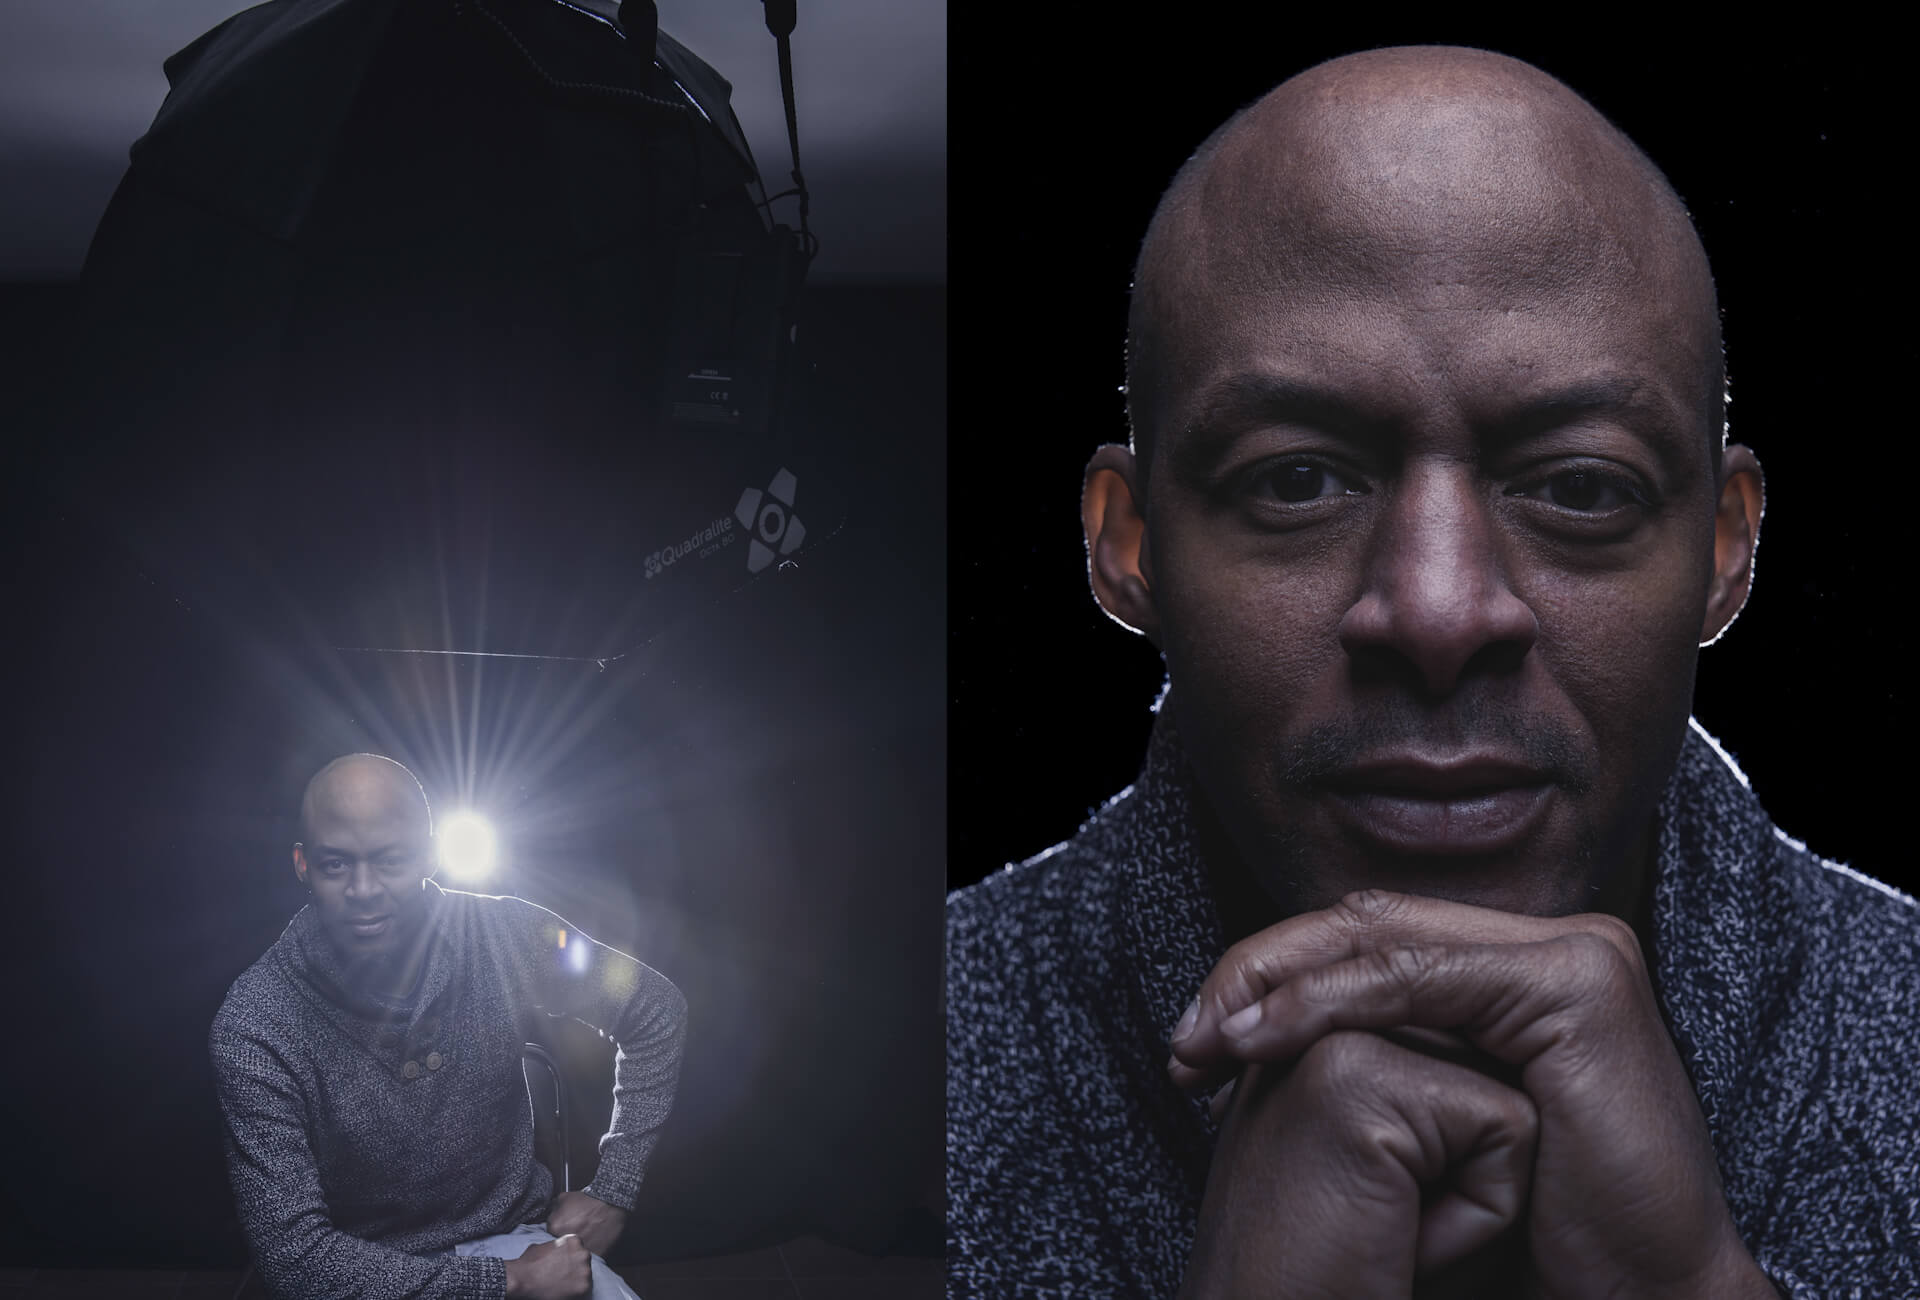
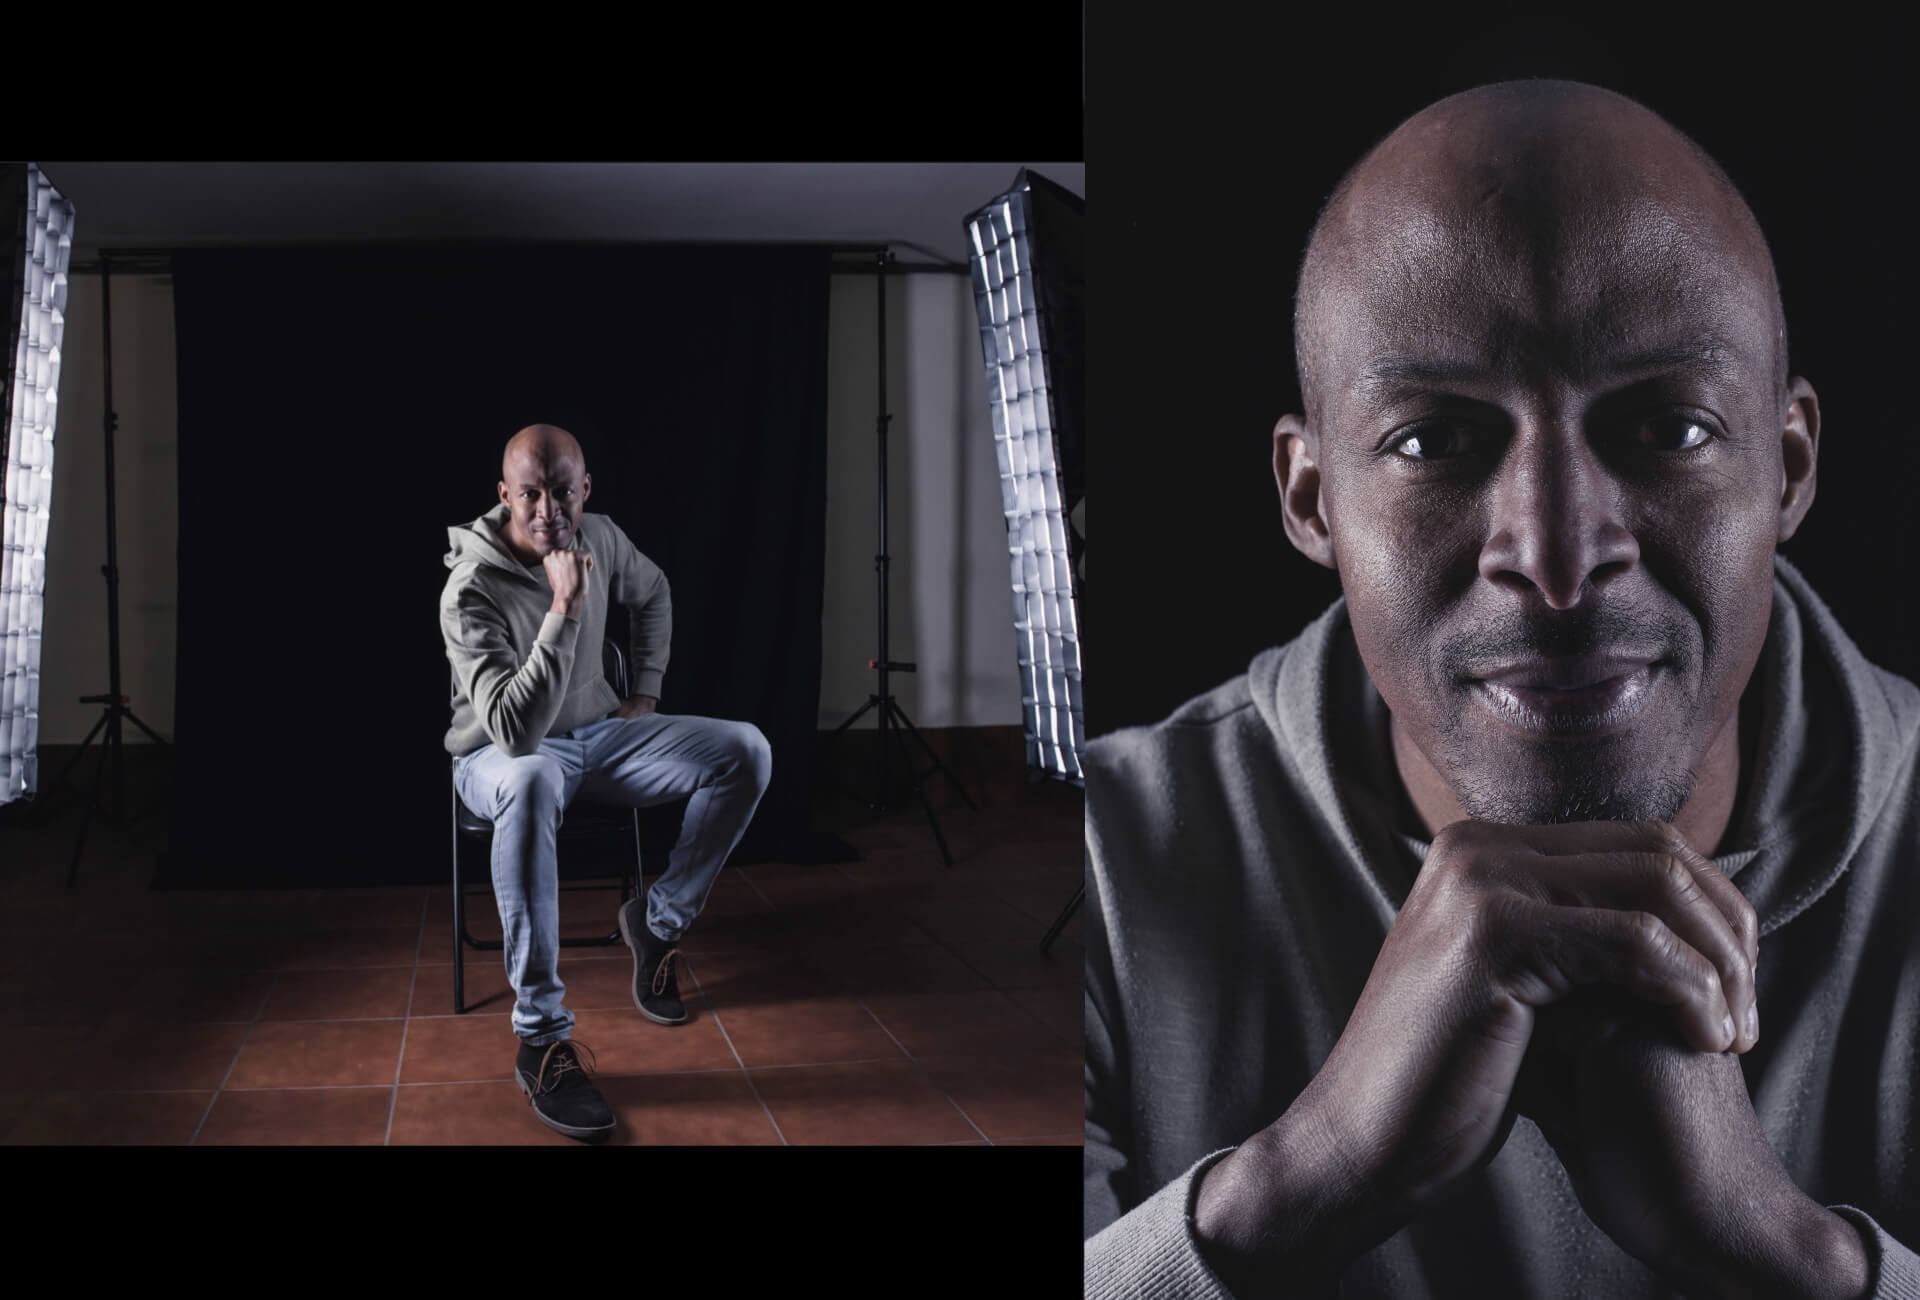
FILL LIGHT (90°)
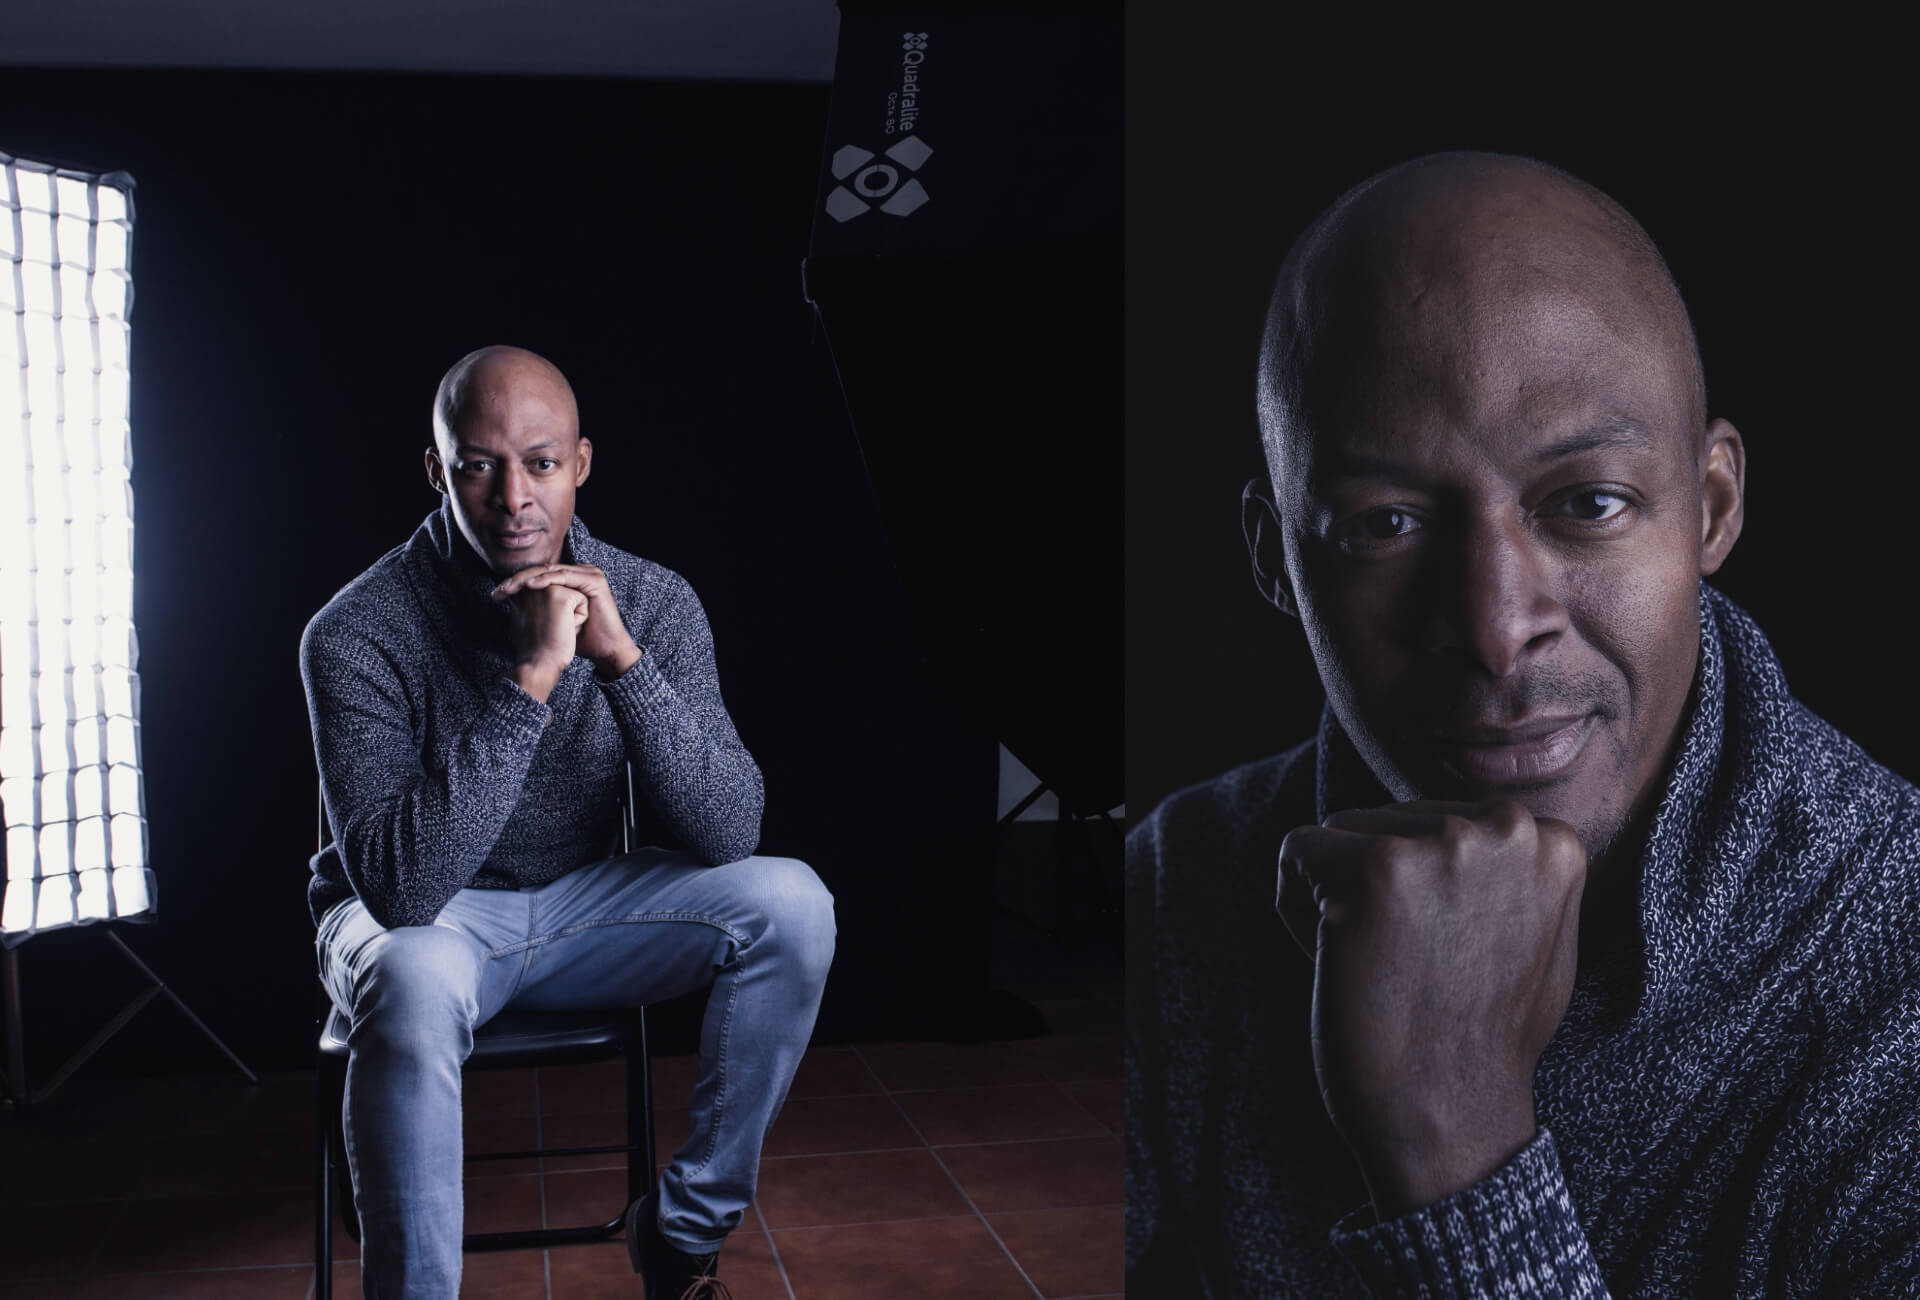
Here, we place the light source at face height, 90 degrees to our model. This type of lighting, with just the one source of light, allows us to obtain very dark shadows and is ideal for accentuating details and increasing the drama in the picture. We can obtain a more intensive light by getting rid of the diffusion surface.
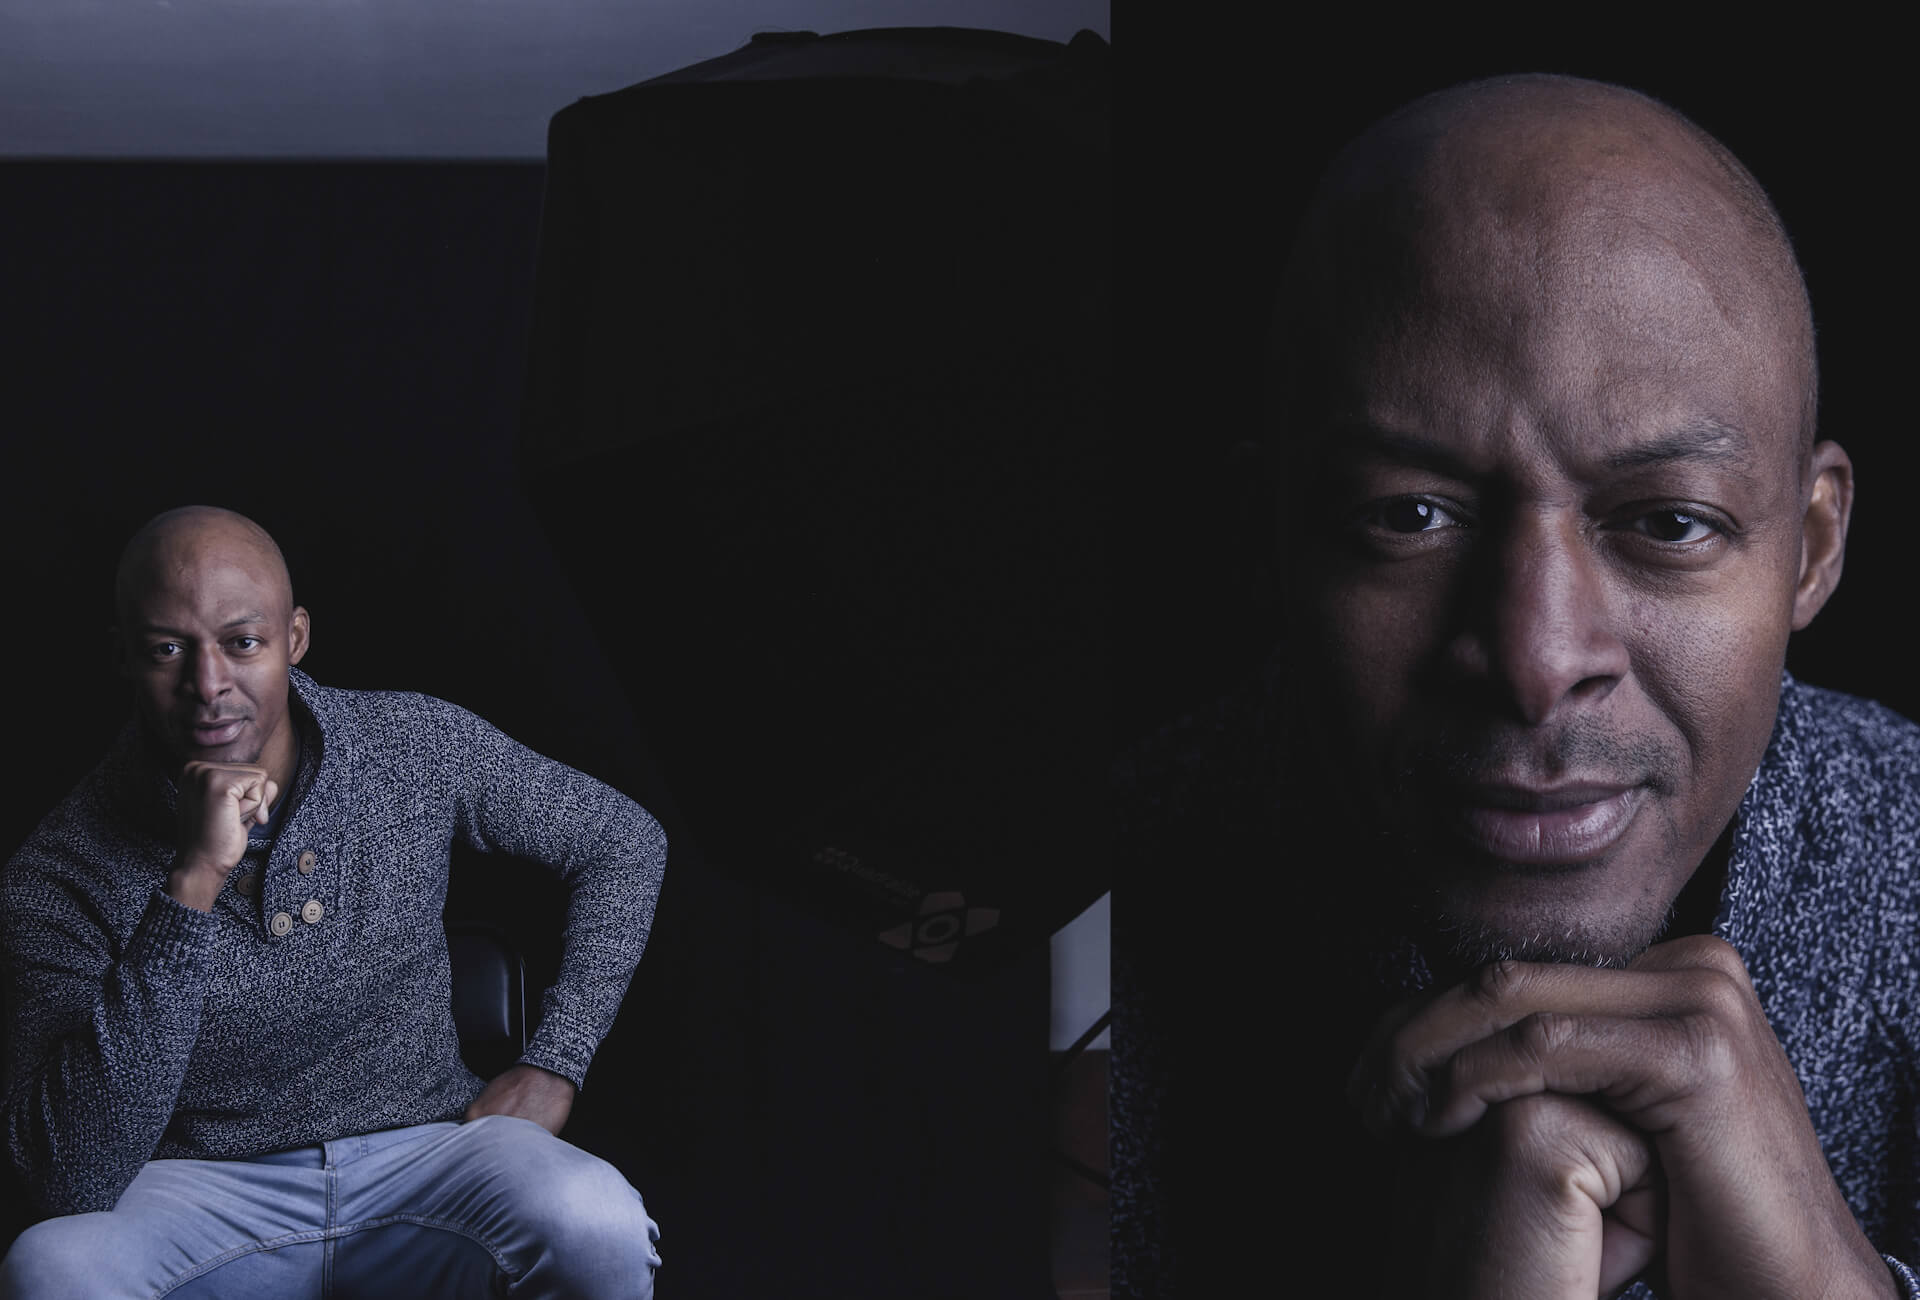
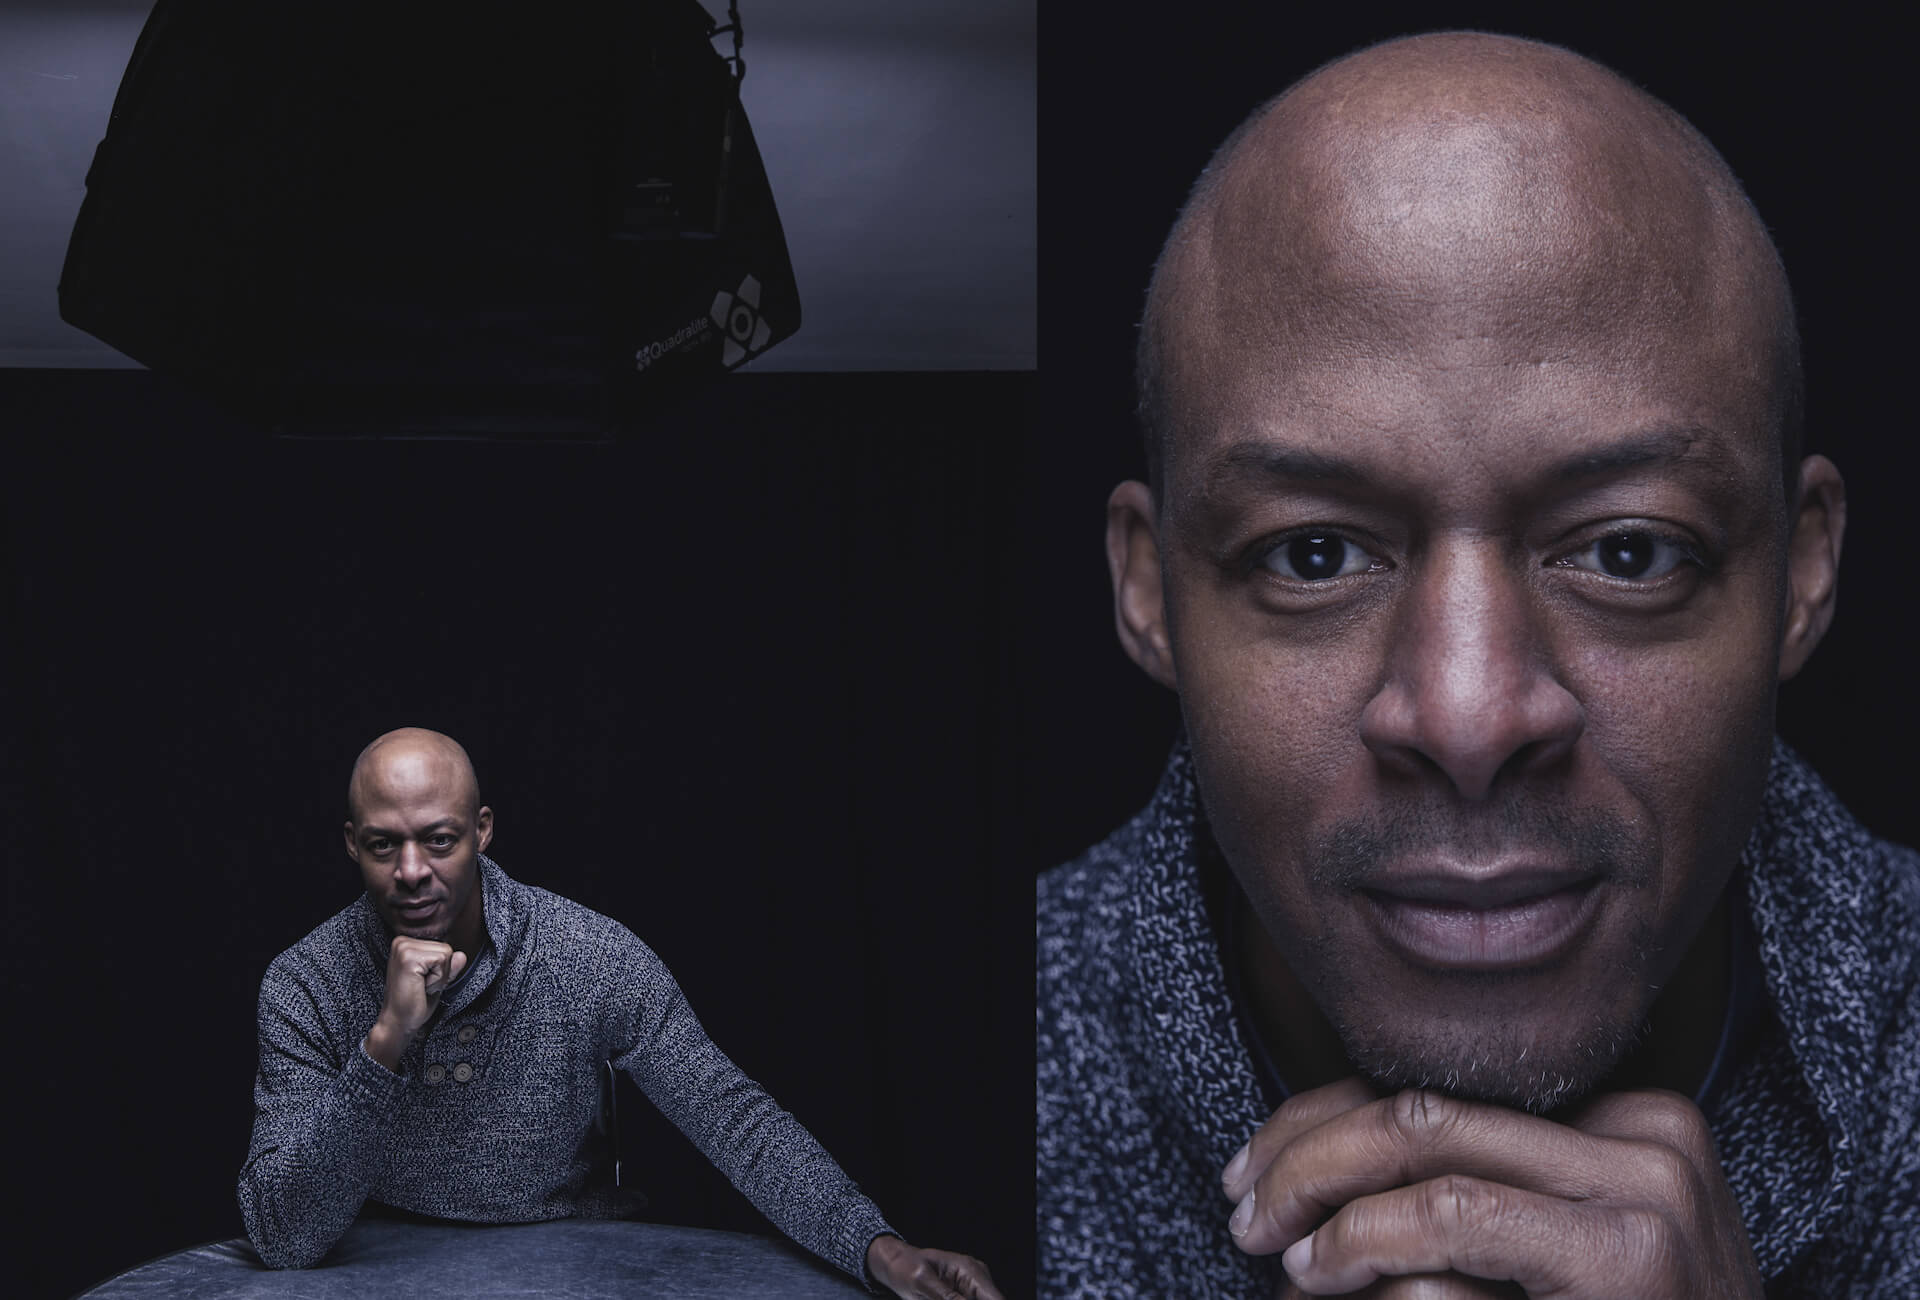
REMBRANDT LIGHTING (45°)
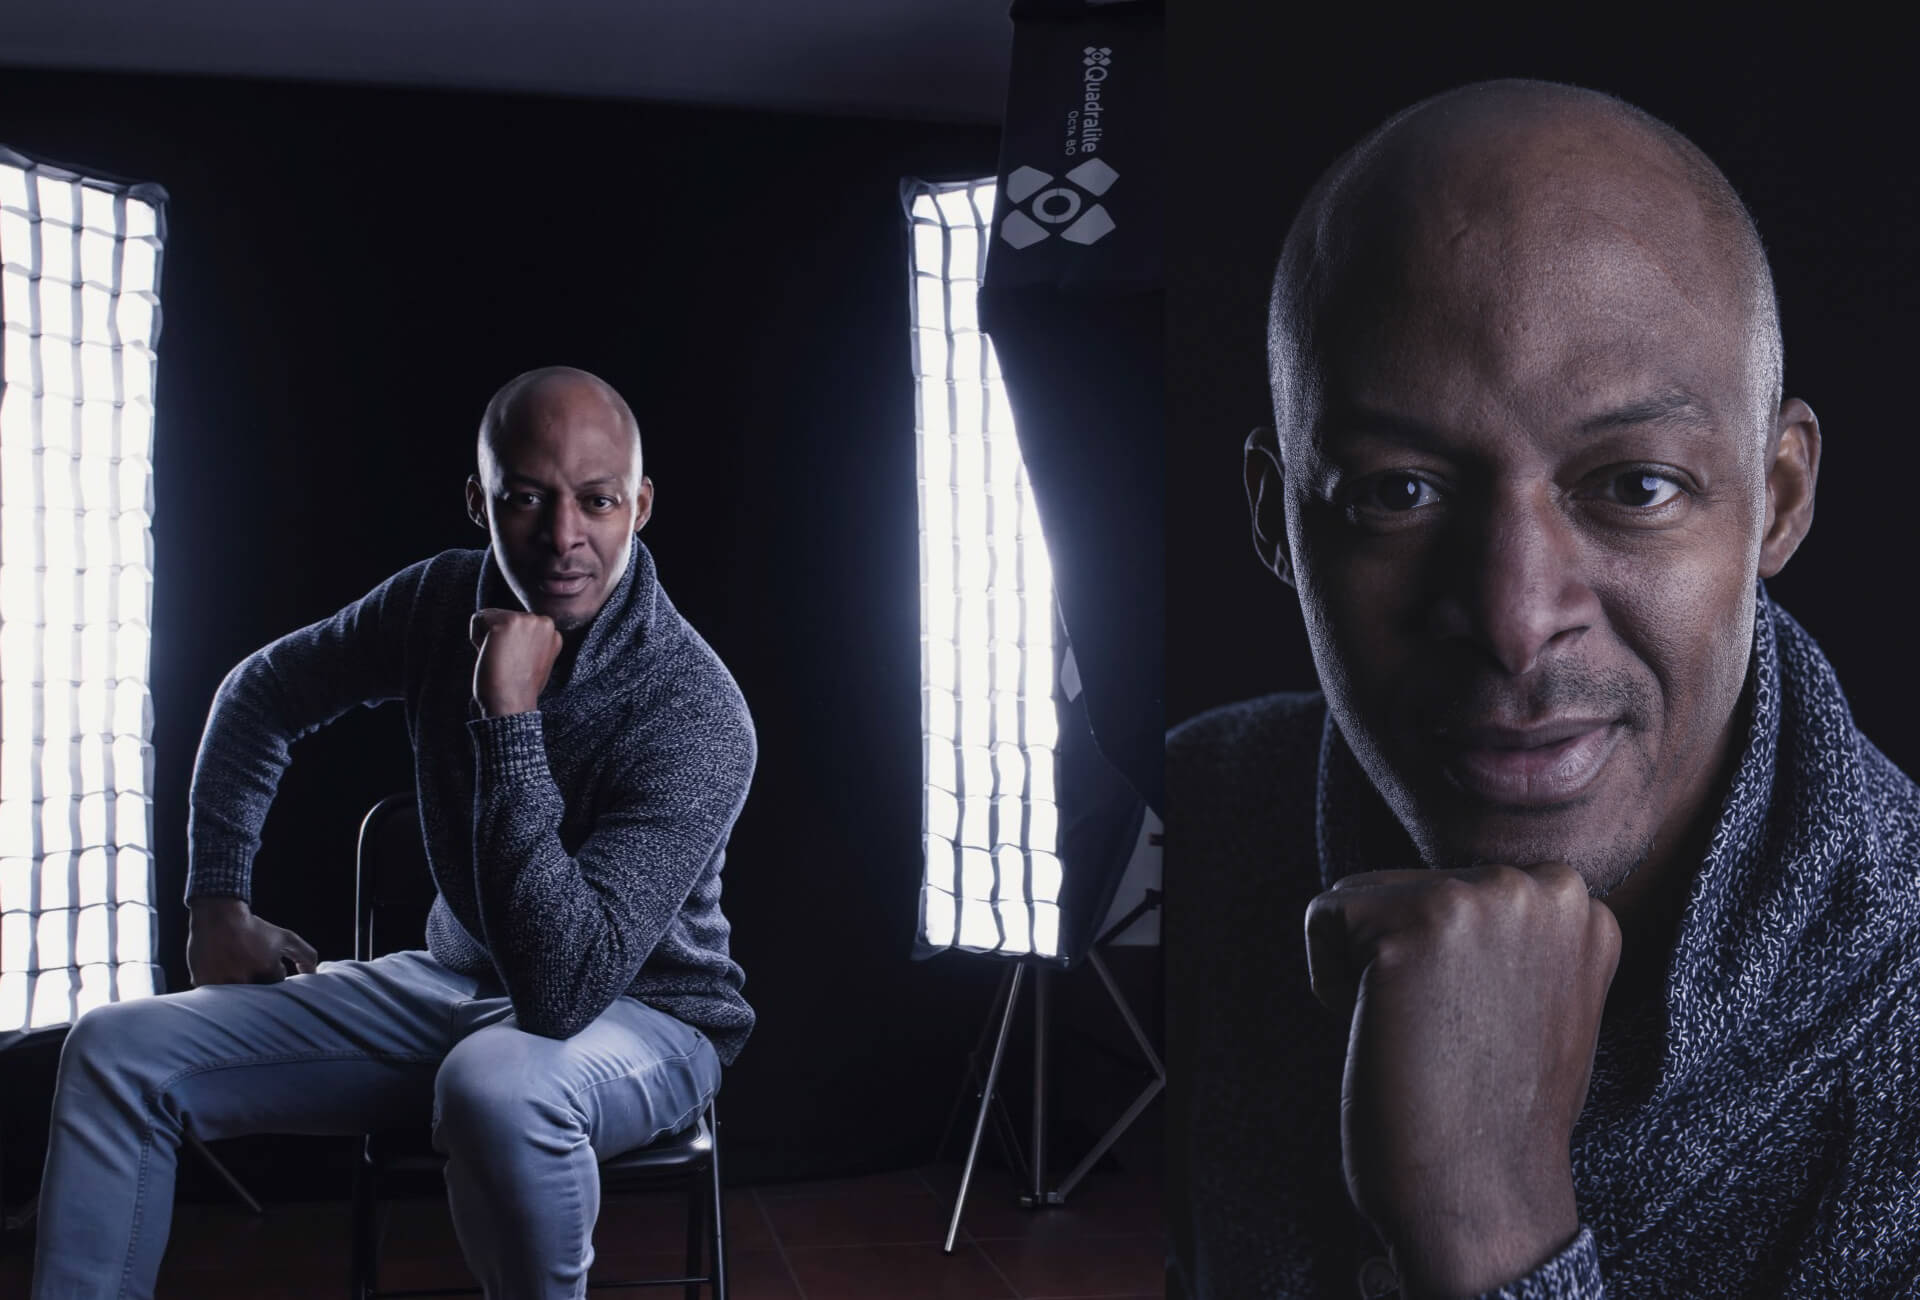
In this lighting scheme, the lamp is placed at a 45-degree angle to the nose of our model. Half of the face in the portrait is in a light semi-darkness, with a characteristic, delicate triangle of light on the cheek. Thanks to such a setting of the light source we get the effect called the Rembrandt Triangle – the name comes from the painter who used this type of face lighting on his models in his works. Despite the apparent delicacy, it is easy to get an effect full of drama.
In the case of the photograph taken by myself, I have placed the light source higher than in the classic Rembrandt lighting; however, the effect obtained is one I believe is fully desirable.
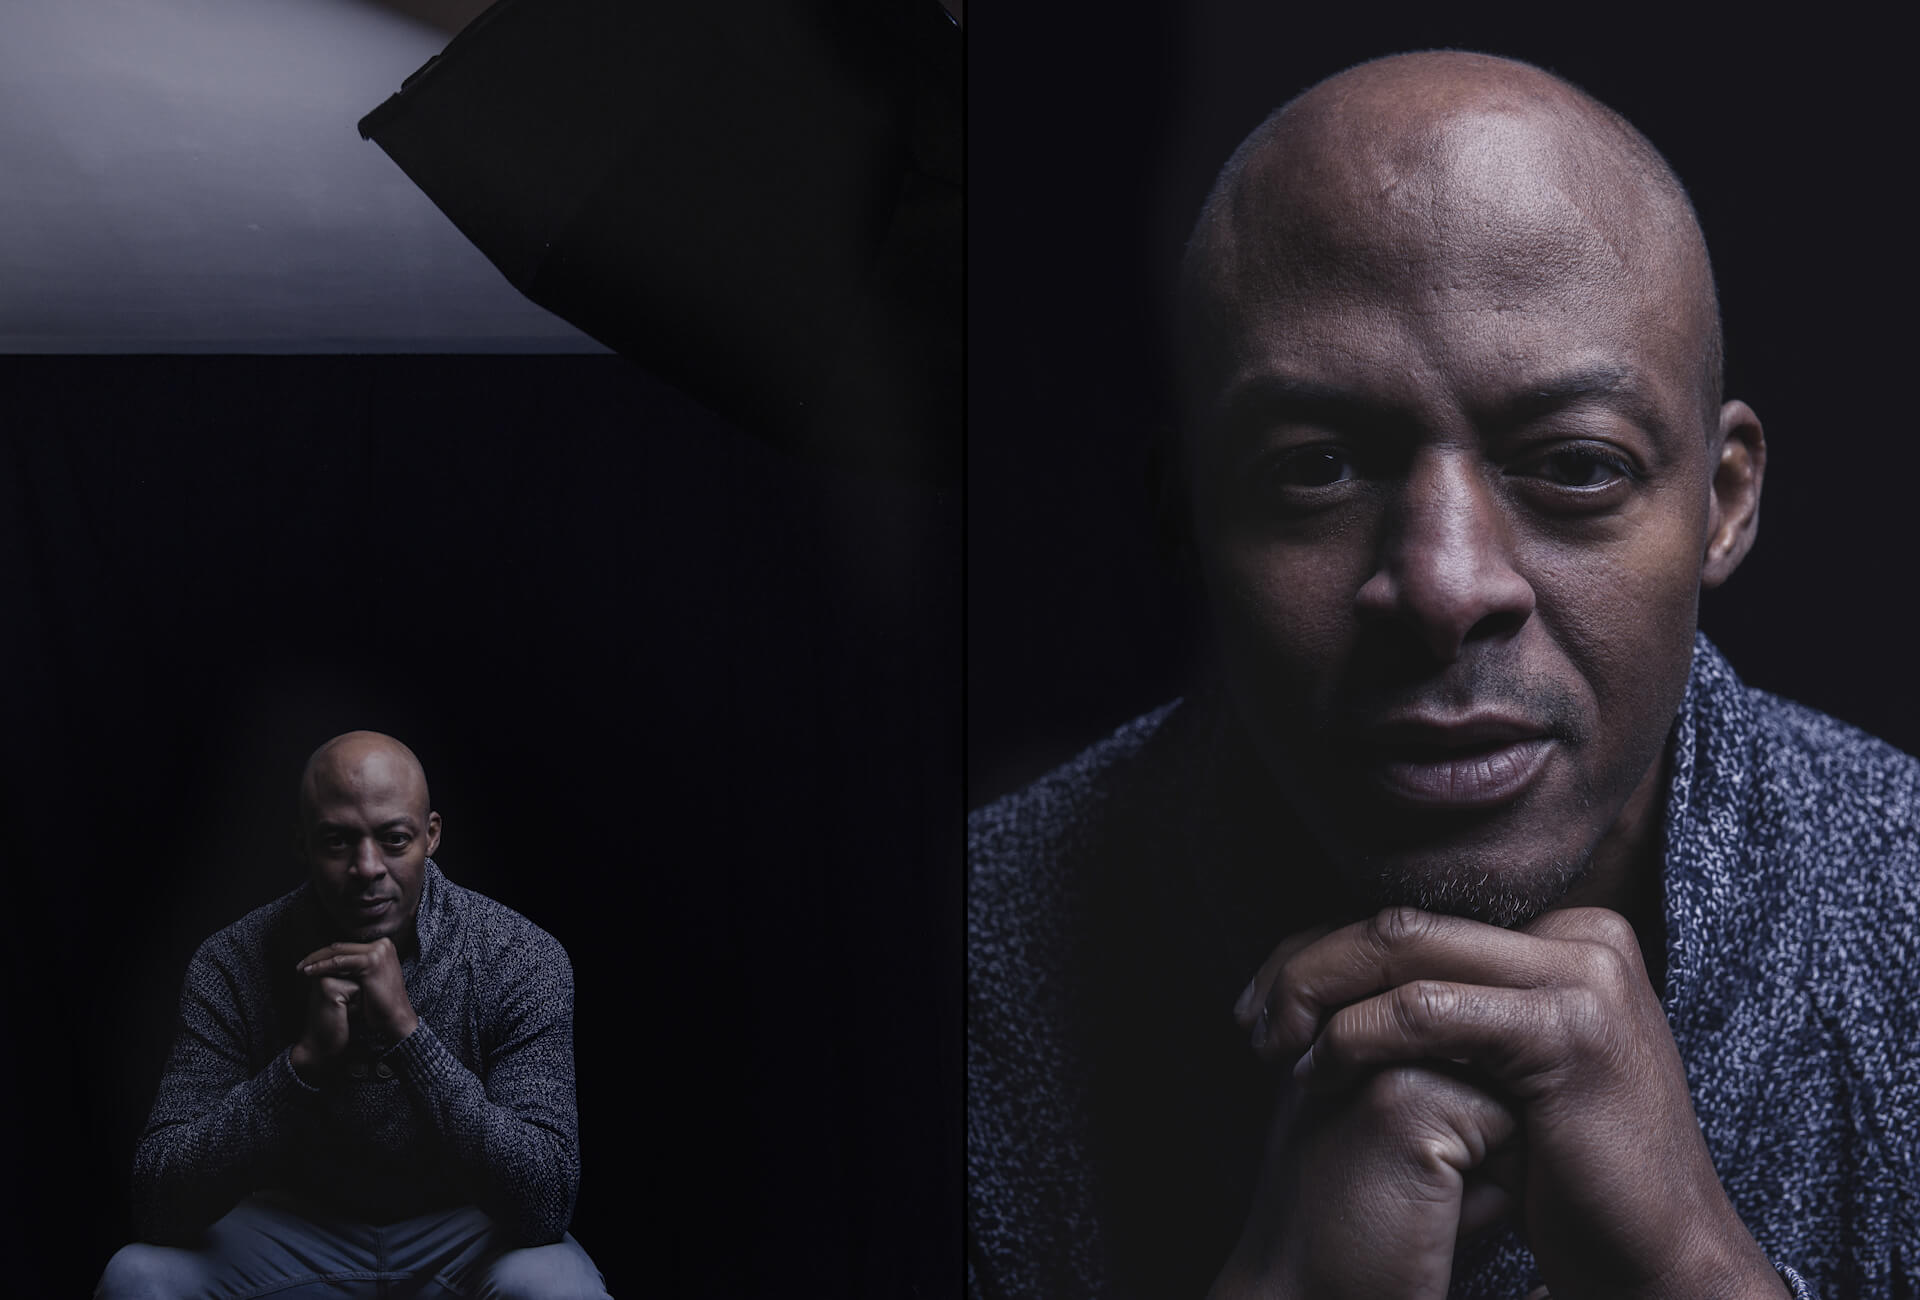
LOOP LIGHTING
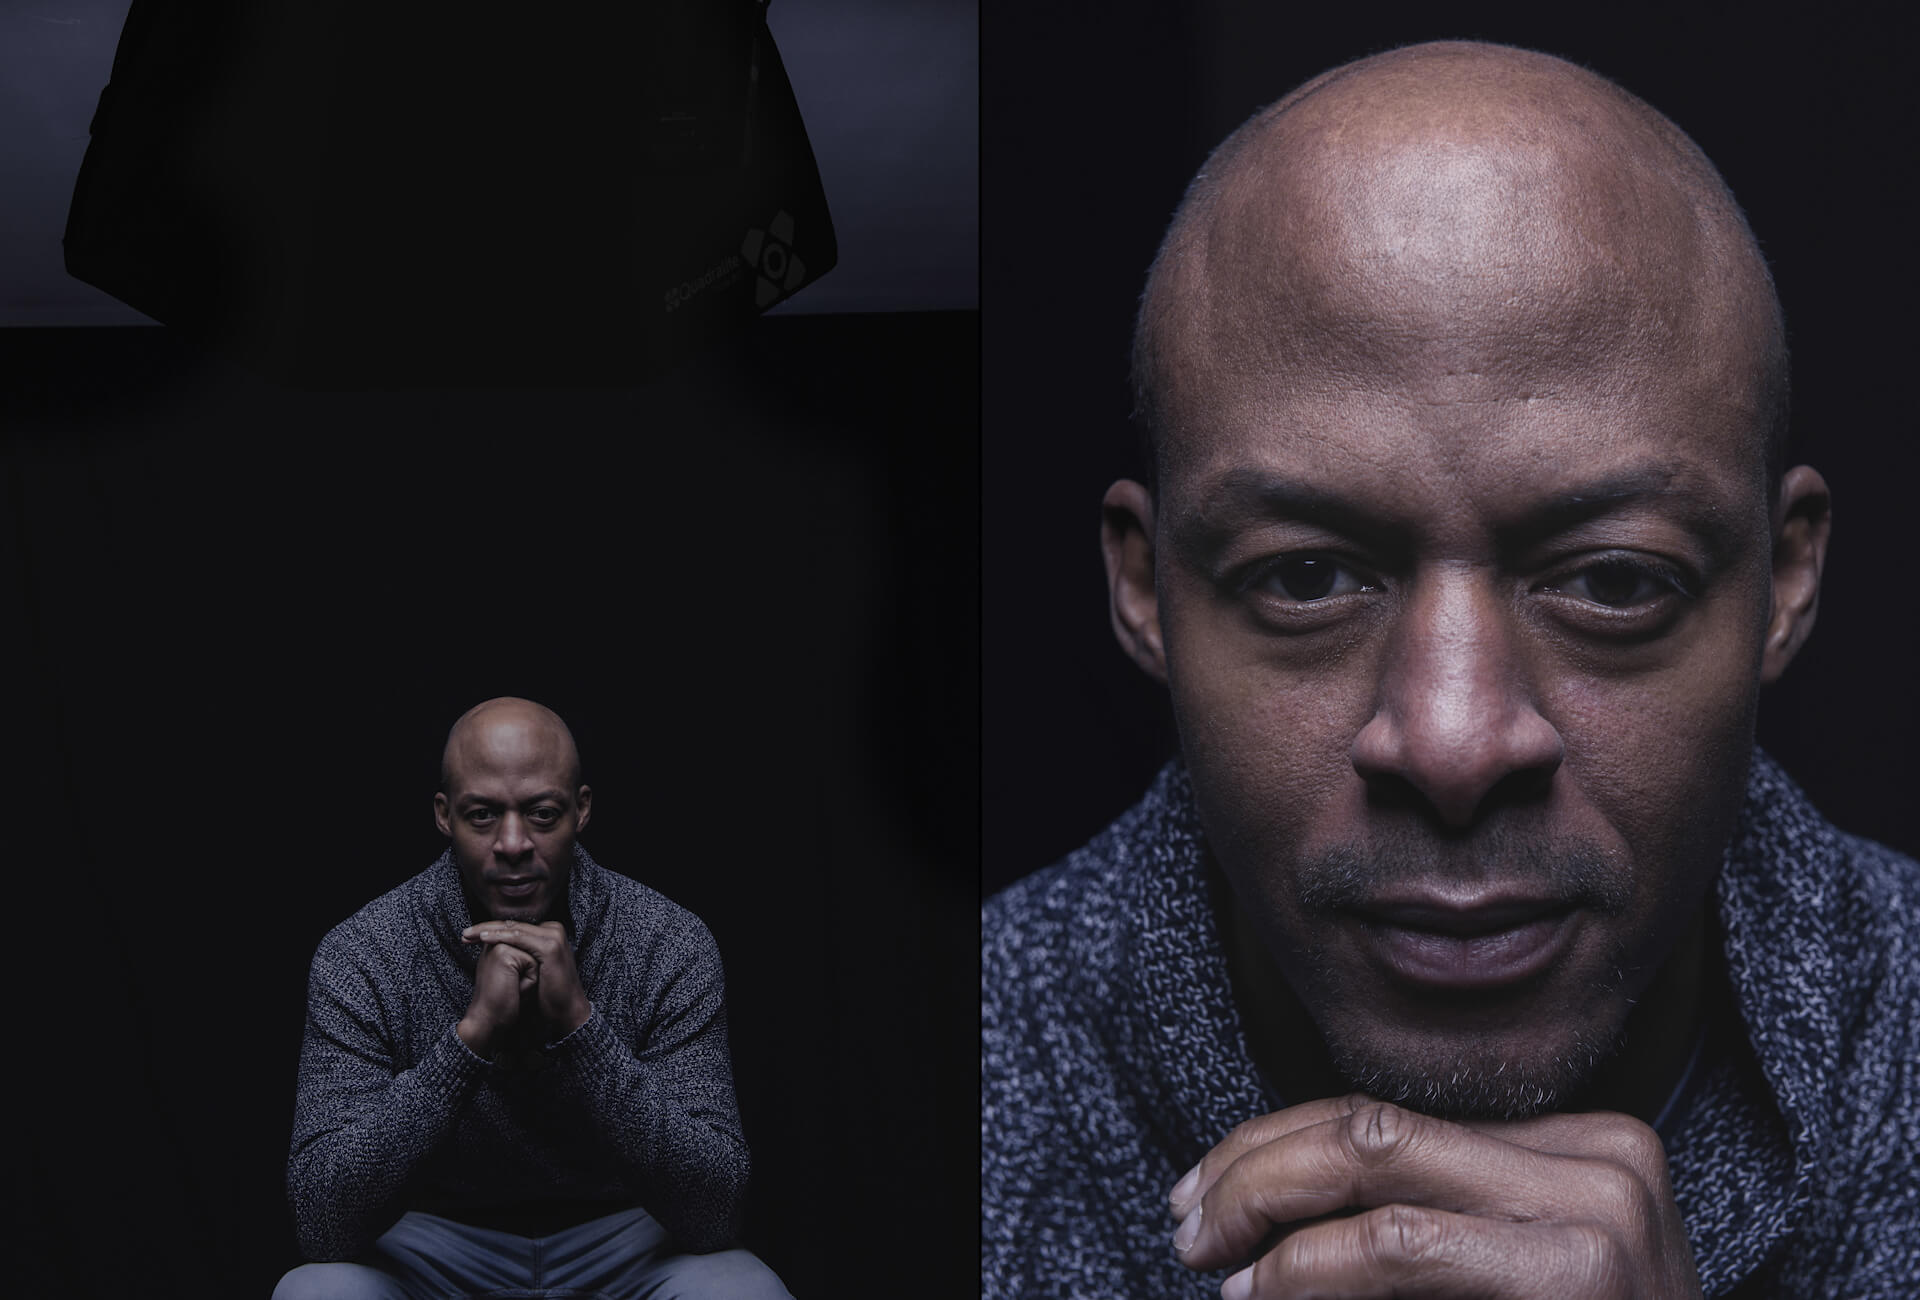
By keeping the previous lamp position (45 degrees), we raise the light source upwards. The effect that we get is a combination between Rembrandt and Butterfly lighting.
It is assumed that, when light falls on a larger area, the skin smooths out but without losing the desired shades, which are more or less soft depending on the modifier used.
In my case, to make the comparison easier, I used Octy together with the diffusion surface.
The location of the light source in the manner described above creates a shadow under the nose, which slants slightly with respect to the light source.
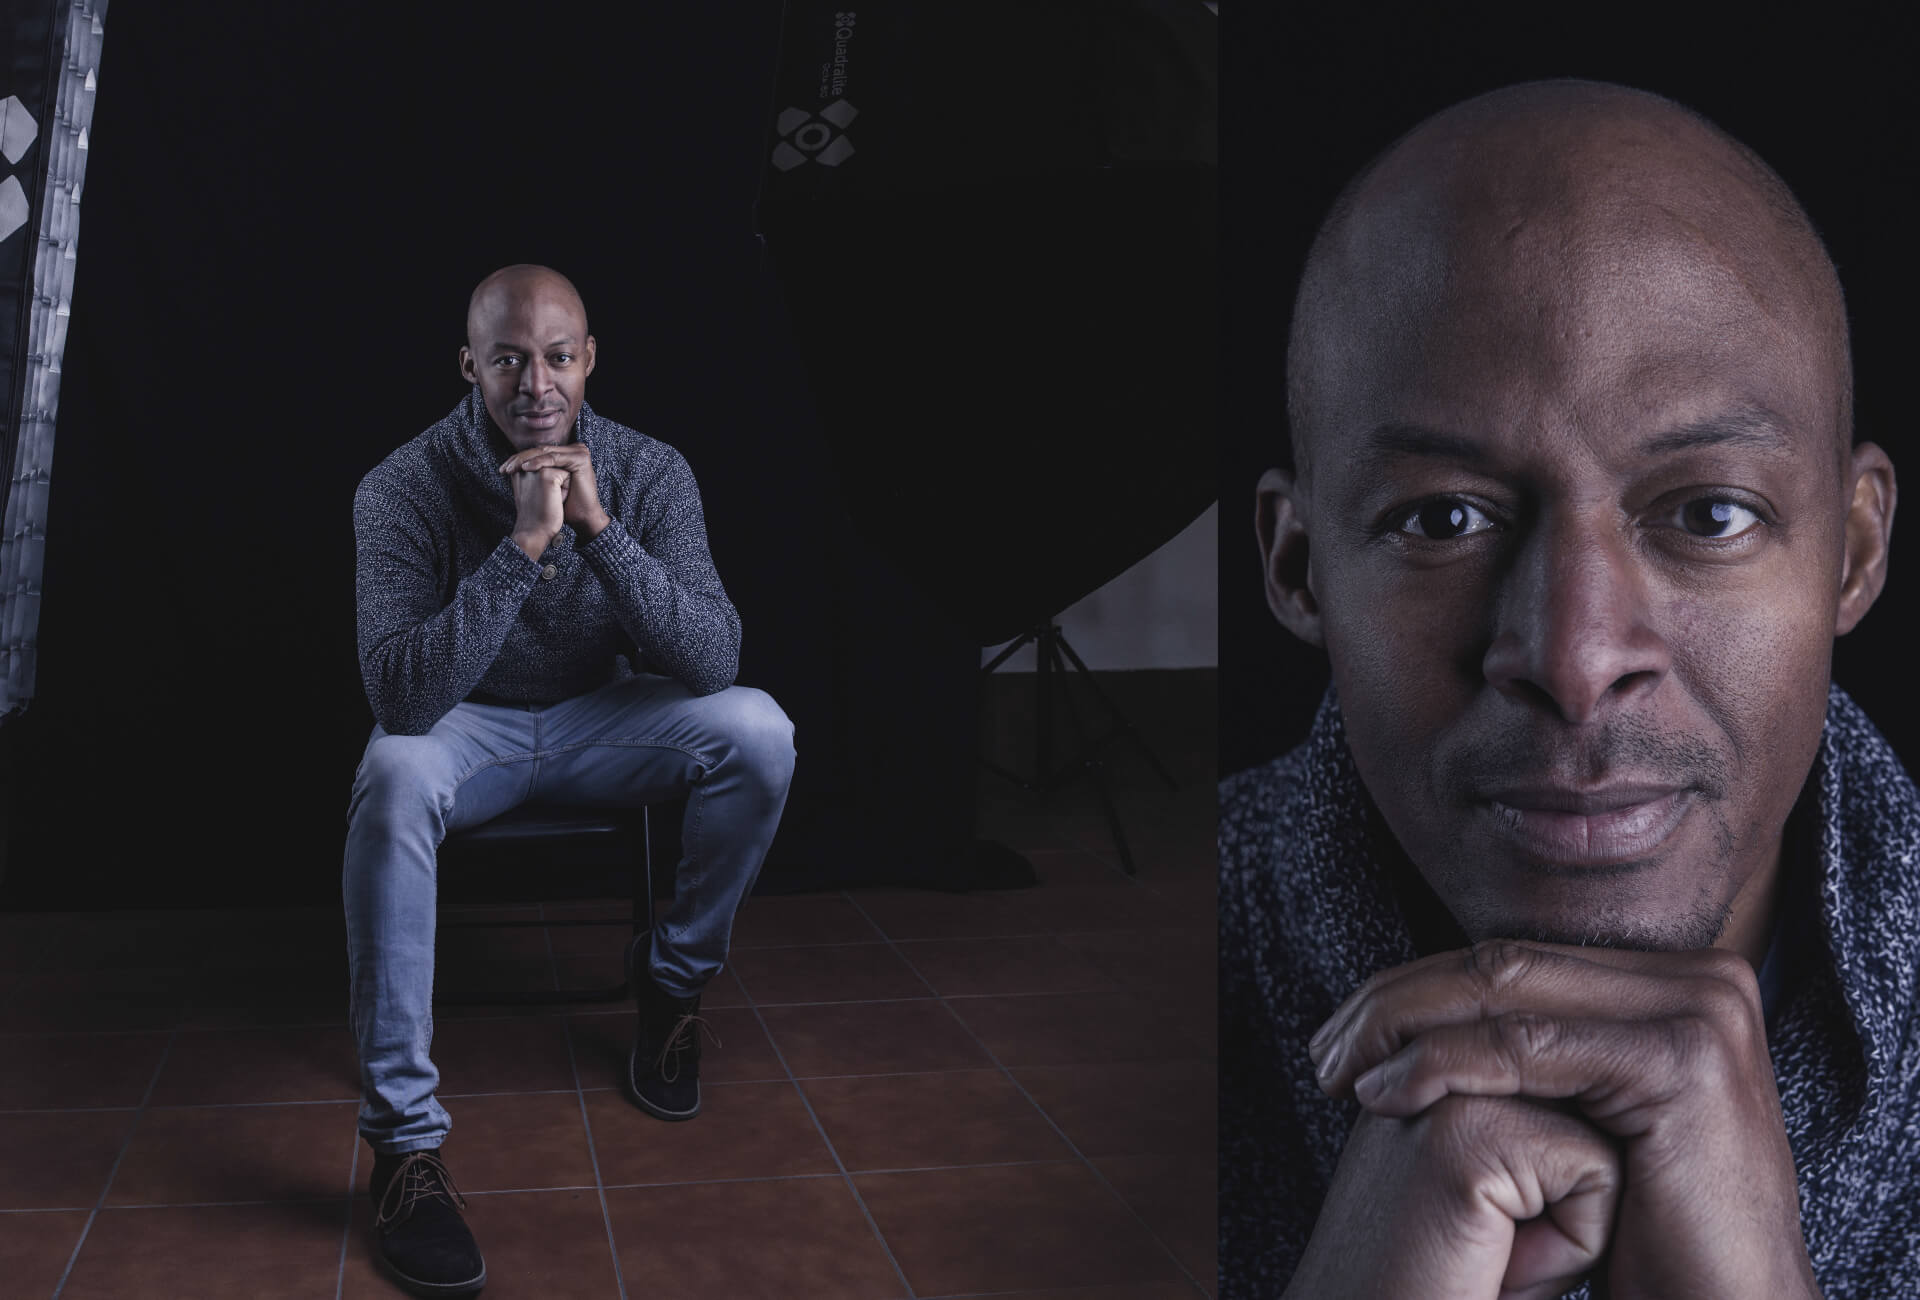
REMBRANDT lighting + fill light
Starting from the Rembrandt lighting scheme, it is possible to relax the shadows obtained with the help of the main light. This can be achieved by adding an additional light source with less power on the darkened side, as in the example picture. I used a rectangular Quadralite 30x120cm softbox with a diffusion surface and a honeycomb (grid) to focus light in the desired position.
REMBRANDT lighting + counter light
In portraits, where I want to emphasize the particular features of the individual being photographed, I like to add a counter-light. In this case, the rear light is opposite the headlamp and the power of both lamps is the same. It gives us the opportunity to cut the silhouette away from the background, while retaining the lighting typical of the Rembrandt lighting scheme.
REMBRANDT lighting + counter light on both sides
By adding a third light source, we get a significant opportunity to change the effects obtained by simply modifying the power of the light. The obtained effect is particularly applicable in commercial and business portraits.
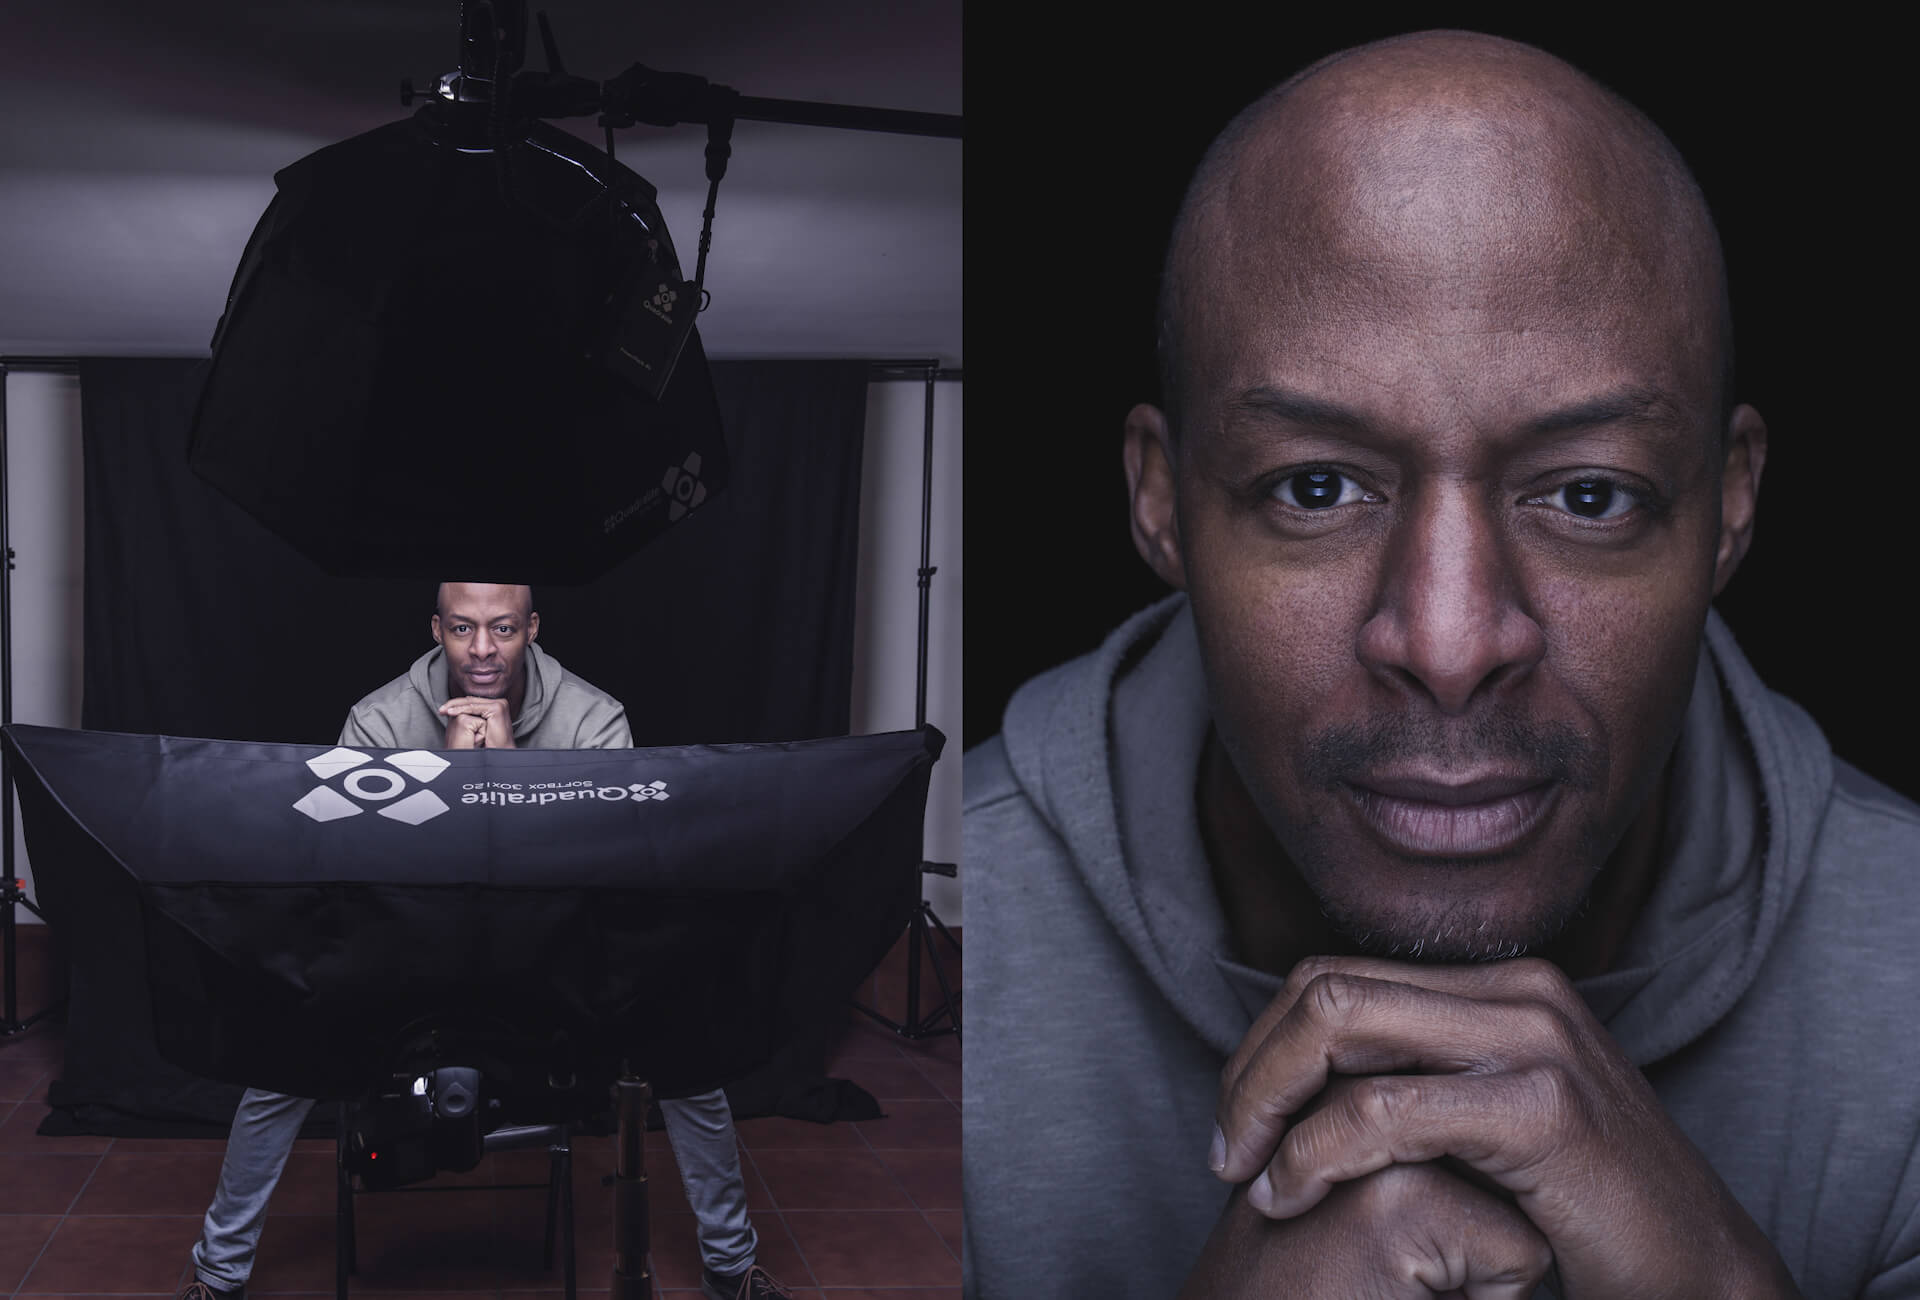
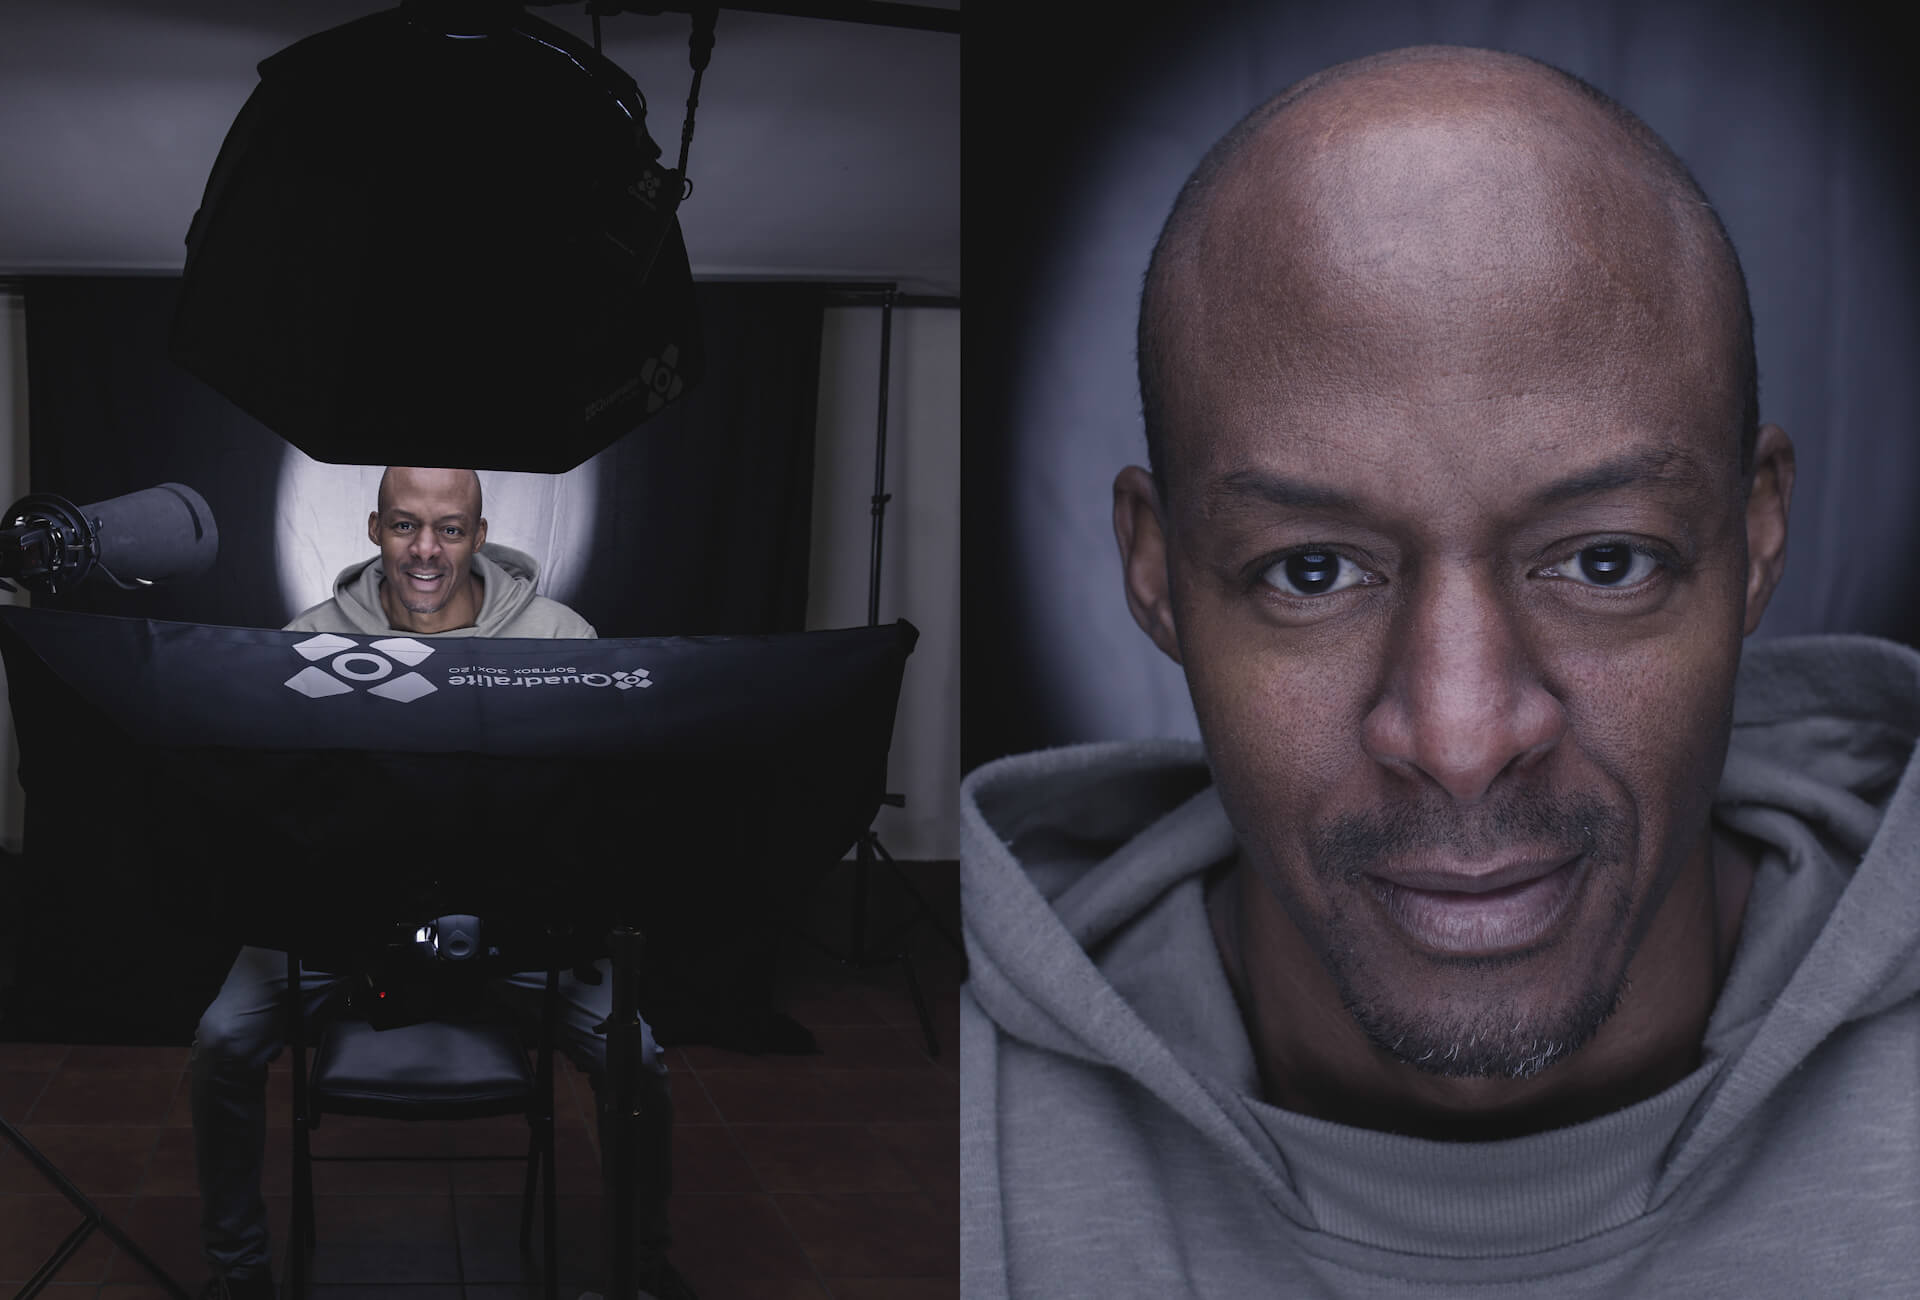
Paramount Lighting (Butterfly)
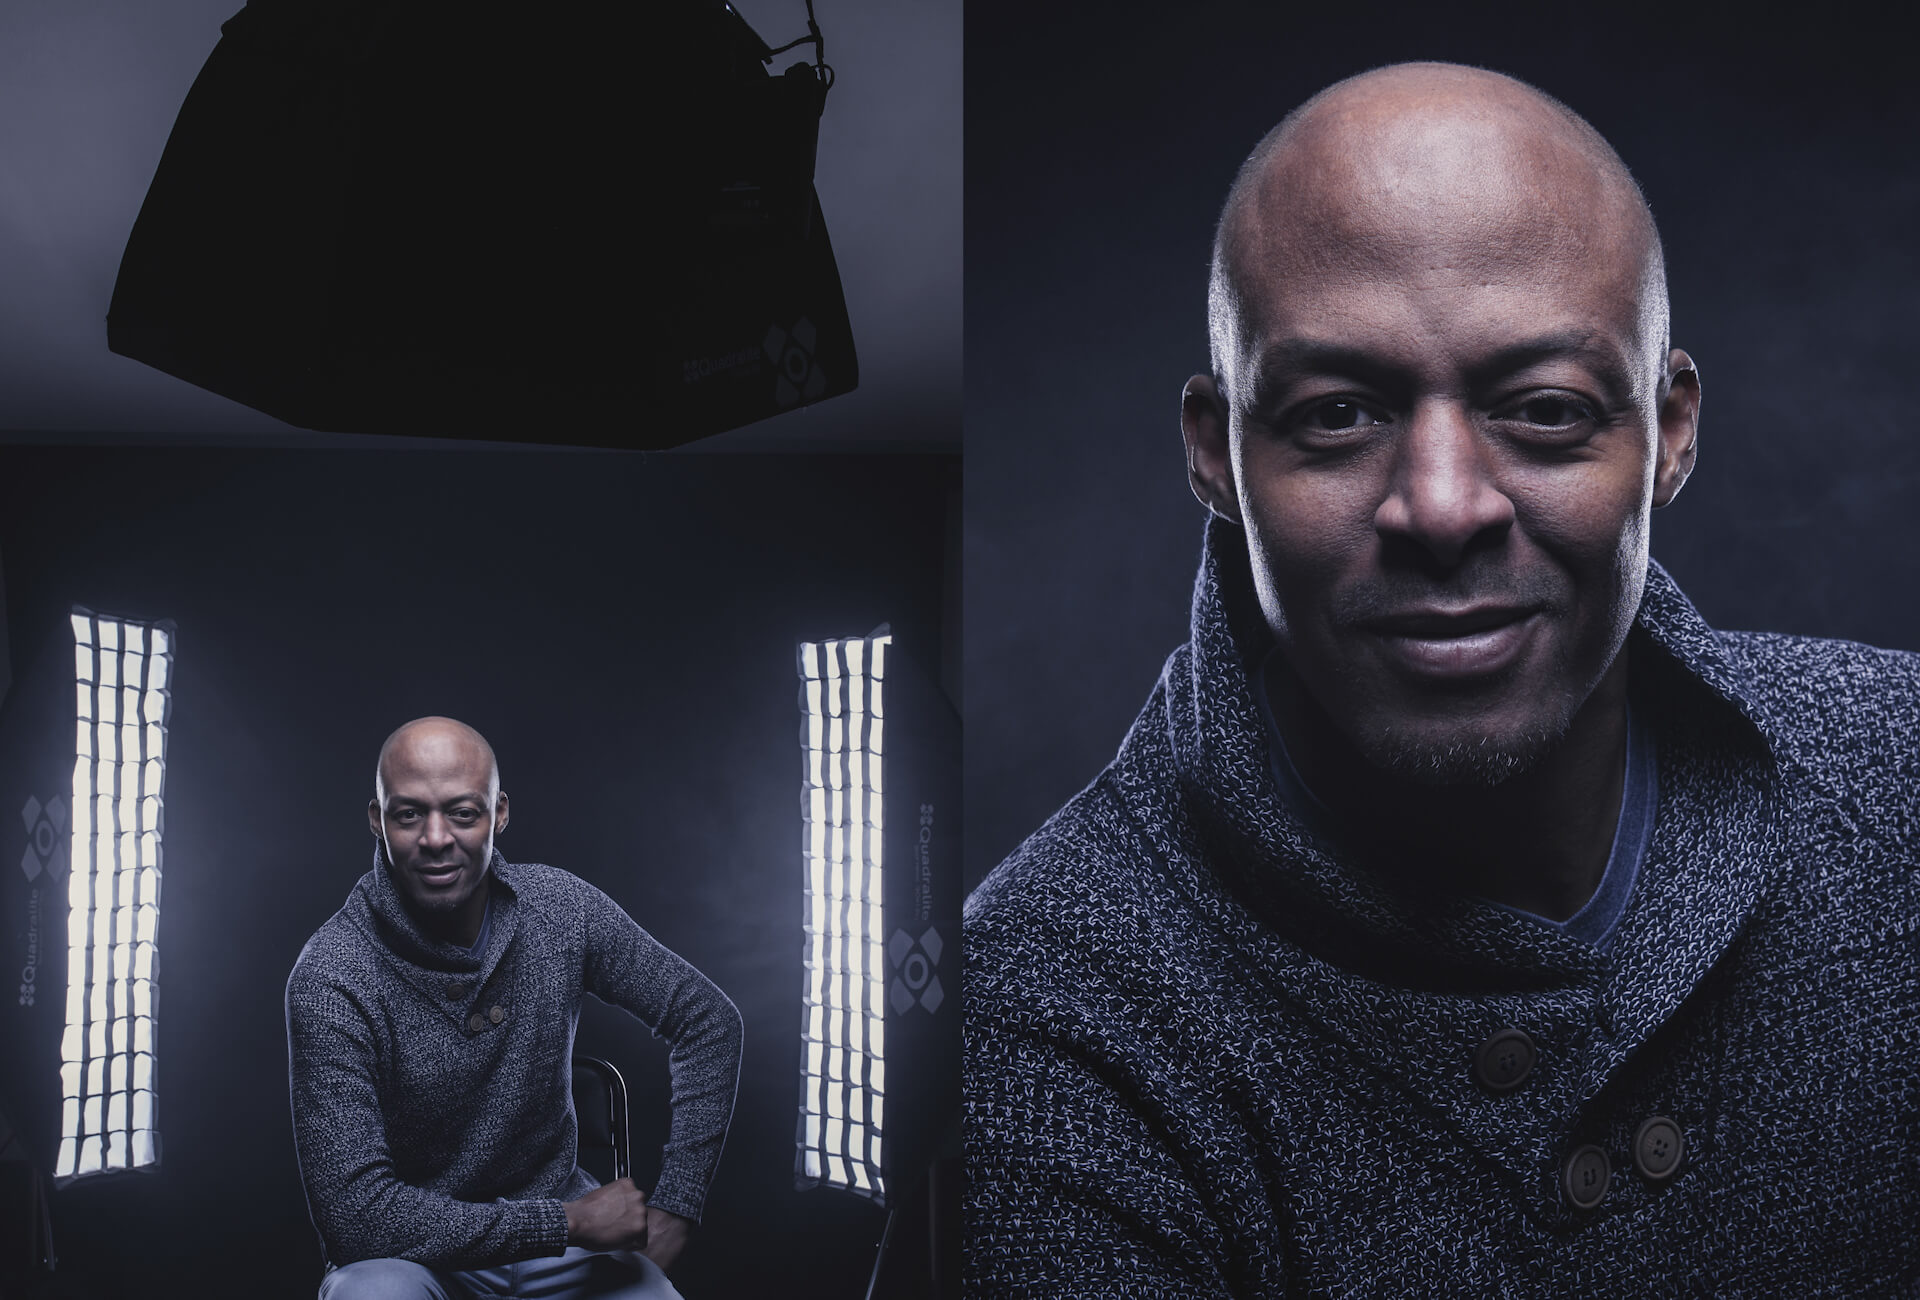
In the case of a lighting scheme called "Butterfly", the main light source is placed from the top, facing our model. To take a picture, we place the camera just under the light source, in this case under the Octa. The "Butterfly" lighting scheme owes its name due to the effect that we get; under the nose of the model a shadow is created, the shape being reminiscent of a butterfly. We can successfully use this scheme both for photographs of the entire silhouette and those that are more tightly controlled.
Paramount Lighting + counter light on both sides
The previous lighting scheme can be varied by adding the counter-light (rear-sided), located on both sides of our model, thus accentuating the silhouette.
Paramount Lighting + counter light
When we use only one source of counter-light, we can place this behind our model.
Paramount Lighting + Reflector
In those instances when the shadows under the nose and eyes – that have been obtained with the help of the light from the top – are too strong, we can break them up using a reflector located on the knees of our model. The use of a blend as a reflecting surface also allows us to add an additional blink and light up the eye. This type of lighting is often used in fashion portraits or beauty portraits – it also applies to models where we try to reduce the wrinkles on the face.
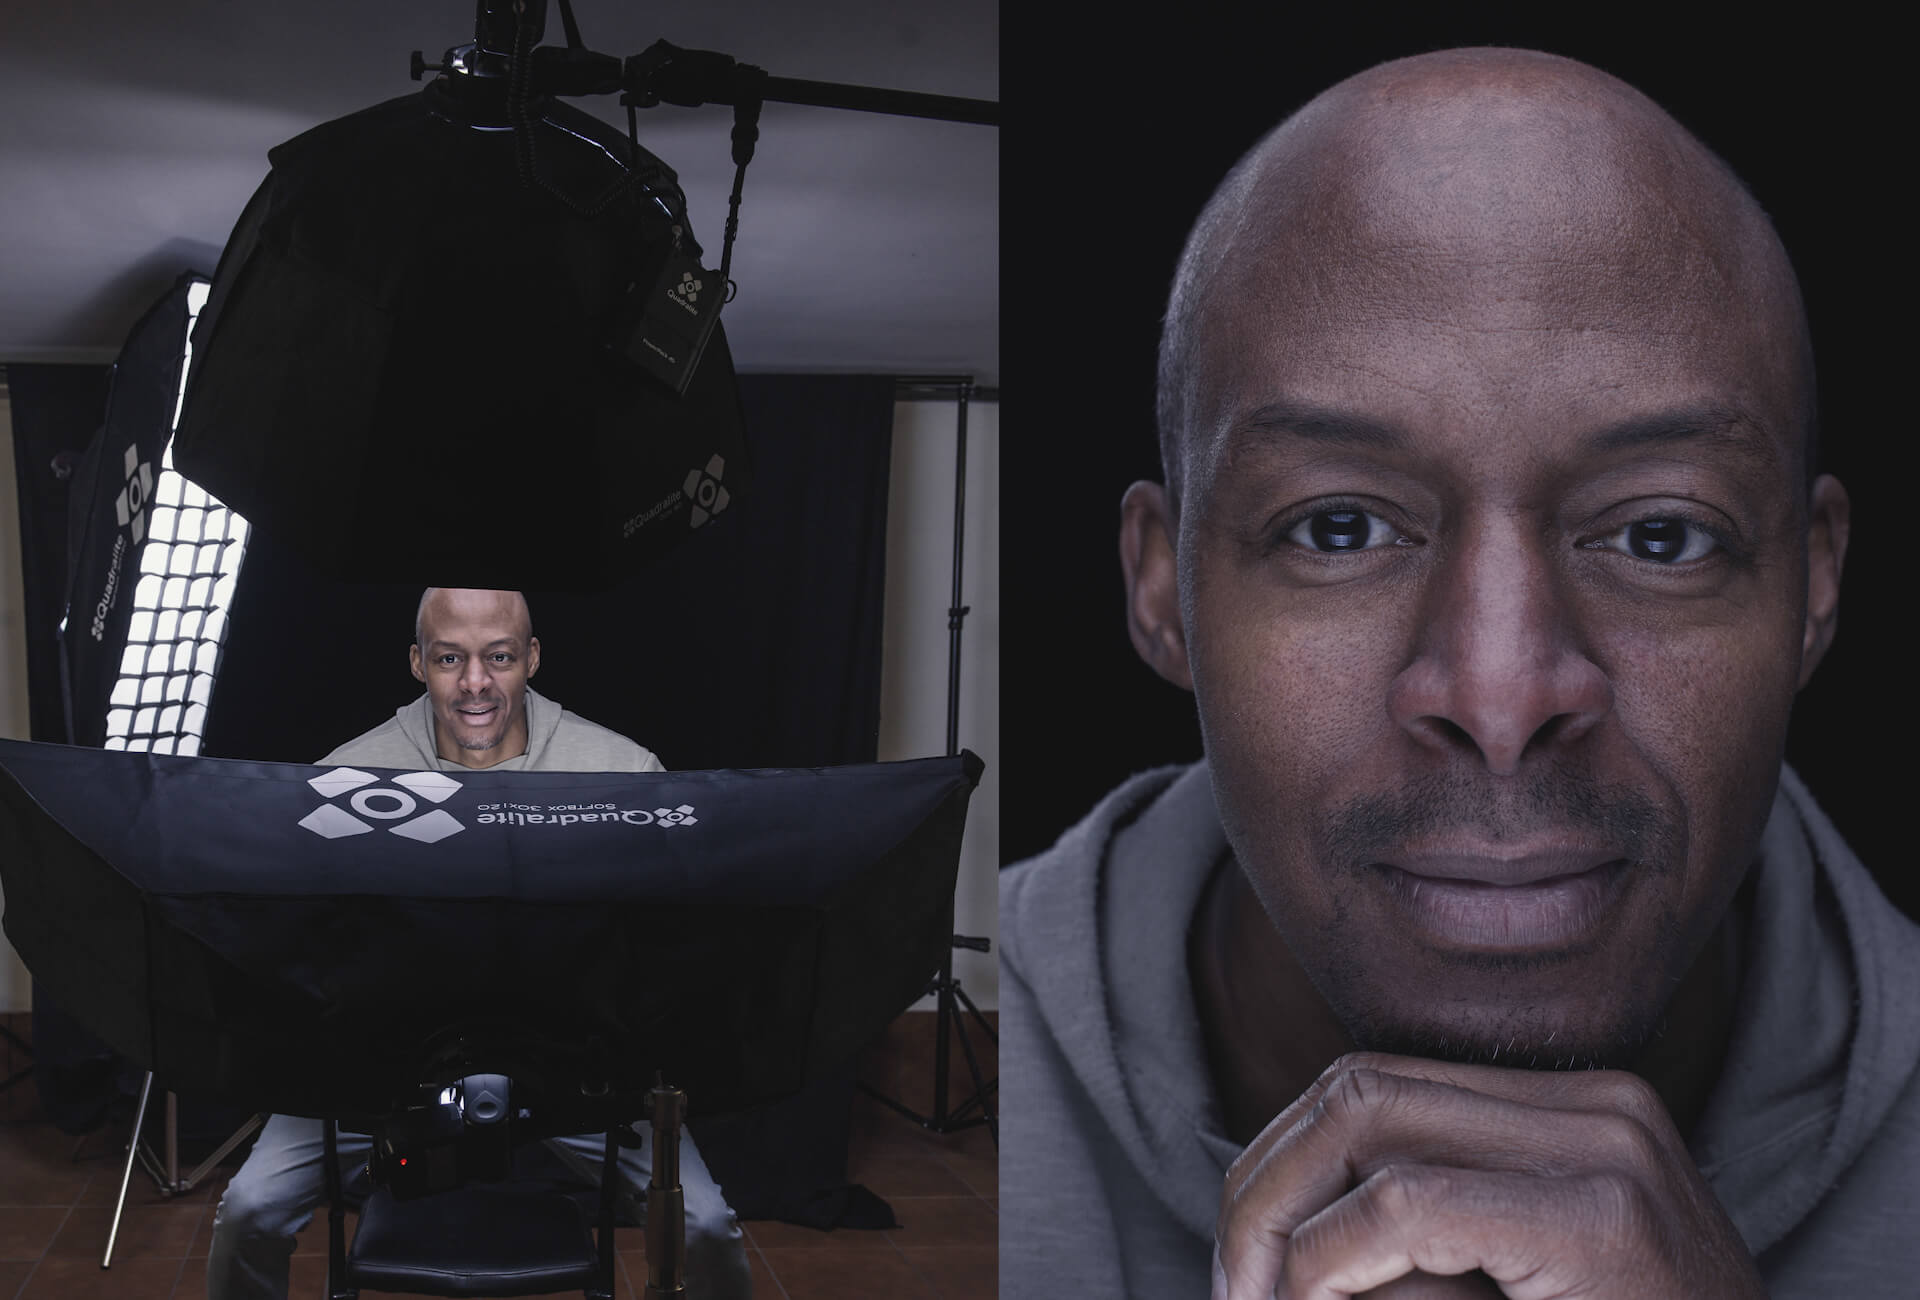
CLAMSHELL Lighting
As in the previous lighting scheme, the main light source is placed from the top, and the blend is replaced with an additional light source. It allows us to graduate the effect according to our needs. Lighting of this type is often used in fashion and beauty portraits.
CLAMSHELL Lighting + counter light
For the previous lighting scheme we can also add a counter light, allowing you to get a more three-dimensional effect and cut the model from the background.
CLAMSHELL Lighting + background light
Do not be afraid to experiment with backlight. The effects can be very original, either by using appropriate modifiers (in this case a snoot) or by adding coloured filters.
Side light
In conclusion, I will leave you with a lighting scheme that Octa has not been used for.
On both sides of our model, we place two sources of side light, giving an effect that highlights the special features of our model while retaining the darkened central part of the face.
As you can see, the possibilities are endless, depending on how significant is our willingness to experiment with various settings and sources of light. Everyone should adapt them to their needs and preferences, both using the flash light and using the existing light falling through the window.
In addition, each of the lighting schemes may vary depending on the position of the model relative to the lamps. Personally, I love experimenting on portraits, and then playing with different poses, looking at how the light spreads on the model depending on those poses.
The most important thing is to know what effect we can get by means of a specific setting, in order to decide what the portrait of the model will look like.
Equipment used:
- Nikon D810,
- 50mm f / 1.4 and 24-70mm f / 2.8 lenses,
- Main light source: Quadralite Reporter 360 TTL,
- Softbox Quadralite Octa 80cm,
- Softbox rectangular Quadralite 30x120cm with a honeycomb.
Article and photos: Alberto Duran
Model: Toni